Sewing Tutorial: How to Make a Reversible Tote Bag Easily
This post contains affiliate links. As an Amazon Associate, we earn from qualifying purchases.
To make a reversible tote bag, cut two identical main pieces and two strap pieces from contrasting fabrics, apply interfacing for structure, add pockets if desired, sew the straps securely with a reinforced box stitch, assemble the bag with right sides facing, turn it through a lining gap, and close the gap with an invisible ladder stitch. The core principle is creating two complete bag “shells” and joining them.
Most beginners think a reversible bag is just a tote with a lining. That misses the point. A true reversible bag has no wrong side, two exteriors, one construction. The straps are the trick. They must be reversible too, or the illusion fails at the handle.
What follows is a breakdown of the Mindy Makes pattern, the most precise free design available, and the modifications that separate a functional bag from one that looks store-bought. We’ll cover fabric math, the physics of strap anchoring, and the single seam allowance that ruins the turn if you get it wrong.
Key Takeaways
- Use fusible woven interfacing like Pellon SF101 on at least one side; skip it and the bag slouches empty.
- Construct reversible straps by sewing two fabric strips right sides together, turning, and topstitching, never use a single folded strip.
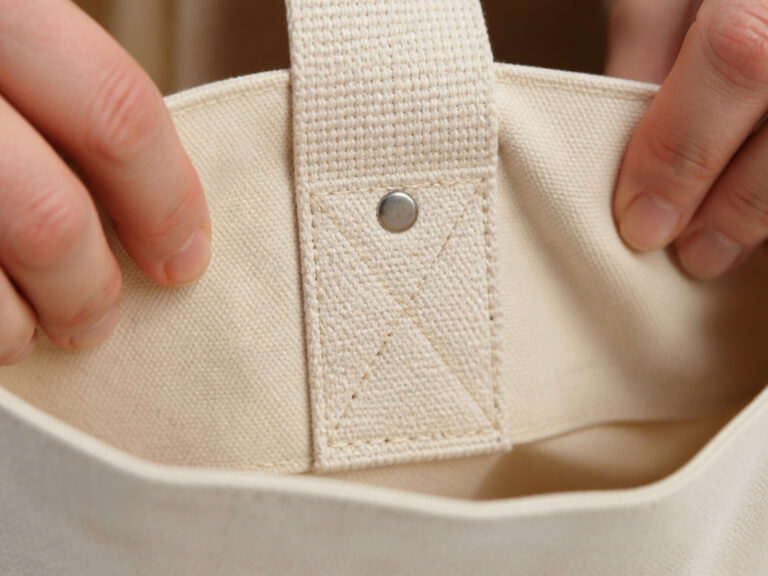
- Anchor straps with a box stitch plus an ‘X’; a single line of stitching pulls loose after a month of heavy use.
- Offset pocket placement between the two bag sides to prevent the bag from listing to one side when loaded.
- For a clean finish, use a 1.5-inch seam allowance at the bag’s top opening; this gives you plenty of fabric to bury the turning gap neatly.
The Anatomy of a Reversible Tote
A reversible tote isn’t a lined bag. It’s two complete bag shells sewn together at the top. Think of it as having two “right” sides from the start. The lining is the other side of the bag.
The Mindy Makes Reversible Tote pattern provides the exact blueprint. Each main piece finishes at 12.5” wide by 13” tall. The straps are 4” wide by about 8” long when dropped. These numbers matter because they dictate how the bag will carry. A strap shorter than 7” won’t fit comfortably over a winter coat shoulder. A main piece narrower than 11” won’t hold a standard folder.
The reversible tote bag is approximately 11.5” wide and 13” tall. The straps are about 8” when fully extended. One side is interfaced for support, allowing the bag to stand on its own, while the interfaced straps prevent stretching and wear from carrying weight.
Your fabric choice is the first permanent decision. For a bag that holds shape, you need a medium-weight woven. Cotton canvas, denim, or a sturdy cotton twill are the default picks. Avoid quilting cotton alone, it’s too lightweight and will sag. If you love a print on quilting cotton, fuse medium-weight interfacing to the entire piece to give it body.
The Interfacing Non-Negotiable
Interfacing is what lets the bag stand up on its own. It adds memory to the fabric. Skipping it because your fabric “seems stiff enough” is a rookie error. The bag might stand empty after sewing, but after a week of use, the fibers relax and it becomes a shapeless sack.
Use a woven fusible interfacing like Pellon SF101. The knit or non-woven kinds don’t provide the same structured drape. Fuse it to the wrong side of one of your two main fabrics. This is your “structured” side. The other side remains soft, making the bag easy to fold and stash.
Where this goes sideways: Using 20″-wide interfacing on a piece wider than 20″. The Mindy Makes tote piece is 12.5″ wide, but after folding and seam allowances, you need coverage out to the edges. If your interfacing is only 20″ wide, center it on the fabric, leaving a 0.25-inch gap from each side edge before fusing. The heat from your iron can melt the adhesive if it hangs over the fabric’s edge.
This is a perfect first sewing a tote bag project because the precision happens in the cutting and fusing. The sewing itself is straightforward.
Cutting and Measuring: Avoiding the Half-Yard Shortage
The biggest waste in bag-making isn’t fabric, it’s miscalculation. Patterns are written for 44″-45″ wide fabric, the standard quilting width. If your stunning canvas is 54″ or 60″ wide, you can buy less.
For the Mindy Makes pattern, a half-yard of each fabric is sufficient for 54″-60″ widths. For standard 44″ fabric, you need a full yard of each. The difference is whether you can cut the 12.5″ x 33″ main piece across the width. On wide fabric, you can.
Here are the exact pieces to cut from Fabric A and Fabric B:
| Piece | Dimensions (per fabric) | Quantity (per fabric) | Notes |
|---|---|---|---|
| Main Tote Piece | 12.5” x 33” (cut on fold) | 1 | This yields a 12.5” x 16.5” piece when folded. |
| Strap Piece | 4” x 20.5” | 1 | Will be cut in half lengthwise later. |
| Pocket Piece (Optional) | 6” x 10.5” (cut on fold) | 1 | This yields a 10.5” x 12” piece when folded. |
Before you cut, pre-wash and dry your fabric. Cotton canvas can shrink up to 5%. If you skip this step and the bag shrinks after its first wash, the once-perfect straps will distort and pucker.
Constructing the Bag: Steps Most Tutorials Gloss Over
The assembly looks simple: make straps, attach pockets, sew straps to bag, join sides. The failure points are in the details most guides treat as obvious.
Making the Reversible Straps
This is the most important part of the bag. A floppy, twisting strap ruins the experience. The goal is a strap that is firm, lies flat, and looks finished from both sides.
Step 1: Interface and Split. Fuse interfacing to the wrong side of both strap pieces (one from Fabric A, one from Fabric B). Then, cut each 4” x 20.5” piece in half lengthwise. You now have four pieces, each 2” x ~20.5”. You will make two straps from these pairs.
Step 2: Sew and Turn. Take one strip from Fabric A and one from Fabric B. Place them right sides together. Sew along the long edge with a 1/4-inch seam allowance. For an easier turn, sew one short end closed as well. Clip the corners, turn right side out using a turning tool or a safety pin, and press flat.
Step 3: Topstitch. Edgestitch 1/4-inch from both long edges. This secures the layers and gives a professional finish.
Common mistake: Making straps from a single folded strip of fabric. This leaves a raw interior seam on one side, which is visible when the bag is reversed. It also lacks the internal stability of two fabric layers. The reversible strap method ensures both sides are “right” sides.
Why does this method work? The two fabric layers, fused to interfacing, create a stiff, stable laminate. The topstitching locks everything in place. A strap made this way won’t stretch or twist under the weight of a laptop and books.
Adding Pockets (The Balance Trick)
Pockets are optional but highly recommended. The construction is simple, but placement is critical for the bag’s balance.
Step 1: Make the Pocket. Fold the 10.5” x 12” pocket piece in half, wrong sides together, to form a 10.5” x 6” rectangle. Sew the two side seams with a 1/2-inch seam allowance. Clip the corners, turn right side out, and press. Fold the open top edge in by 1/2 inch, press, and topstitch closed.
Step 2: Place for Balance. Here’s the non-commodity insight from the pattern: Place the pocket on one main piece so it faces the side without a pocket on the other main piece. If you put pockets on the same side of both fabric pieces, when the bag is loaded, the weight pulls that side down and the bag lists awkwardly. Offsetting them balances the load.
Pin the pocket to the right side of a main piece, centered, 3” up from the bottom fold and 1.5” in from each side. Stitch around the sides and bottom, 1/4-inch from the edge. Sew a vertical line down the center to create two pockets.
This approach to a basic tote bag adds utility without compromising the form.
Attaching the Straps: The Box Stitch
This is where the bag earns its durability. A single line of stitching will fail. The straps bear all the weight.
Trim your finished straps to 20.5” in length. On the right side of a main tote piece, measure 2.5” in from the side edge. Place the strap end here, aligning the raw edge with the bag’s top raw edge. Pin securely.
Stitch a box that is just under 1.5” square, then stitch an ‘X’ inside the box. This distributes stress across a wide area of fabric. Repeat for the other strap on the same piece, then repeat the entire process for the straps on the second main piece.
Final Assembly: The Clean Turn
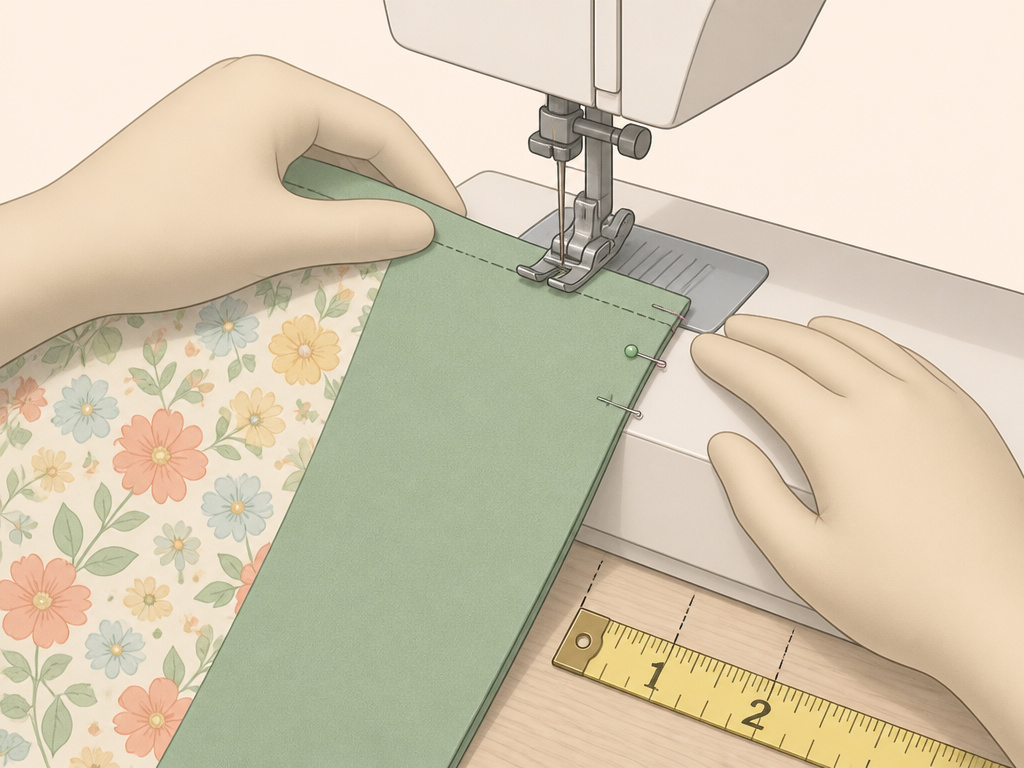
Now you have two complete bag shells, each with straps attached. It’s time to join them.
Step 1: Join at the Top. Place your two main pieces together, right sides facing. The fabrics should be facing their opposites. Fabric A against Fabric B. Sew across the top edge with a 1.5-inch seam allowance. Yes, 1.5 inches. This wide allowance is what you’ll use to cleanly bury the turning gap later. Repeat for the other side of the bag.
Step 2: Sew the Sides. Open the bag so Fabric A is facing itself and Fabric B is facing itself. Match the side seams and pin. Sew down each side with a 1/2-inch seam allowance, but leave a 2-3 inch gap in one side seam. This gap is your turning window. Clip the bottom corners.
Step 3: Turn and Close. Reach through the gap and pull the entire bag right side out. Push out the corners fully. Now, the gap edges need to be folded inward by 1/2 inch and closed invisibly.
Use a ladder stitch (also called an invisible stitch) to close the gap. This hand-sewing technique leaves no visible machine stitching. It’s the difference between a homemade bag and a handmade bag. For a clean, structured finish like a flat bottom tote, press the entire bag thoroughly after turning.
Fabric and Interfacing: A Quick Comparison
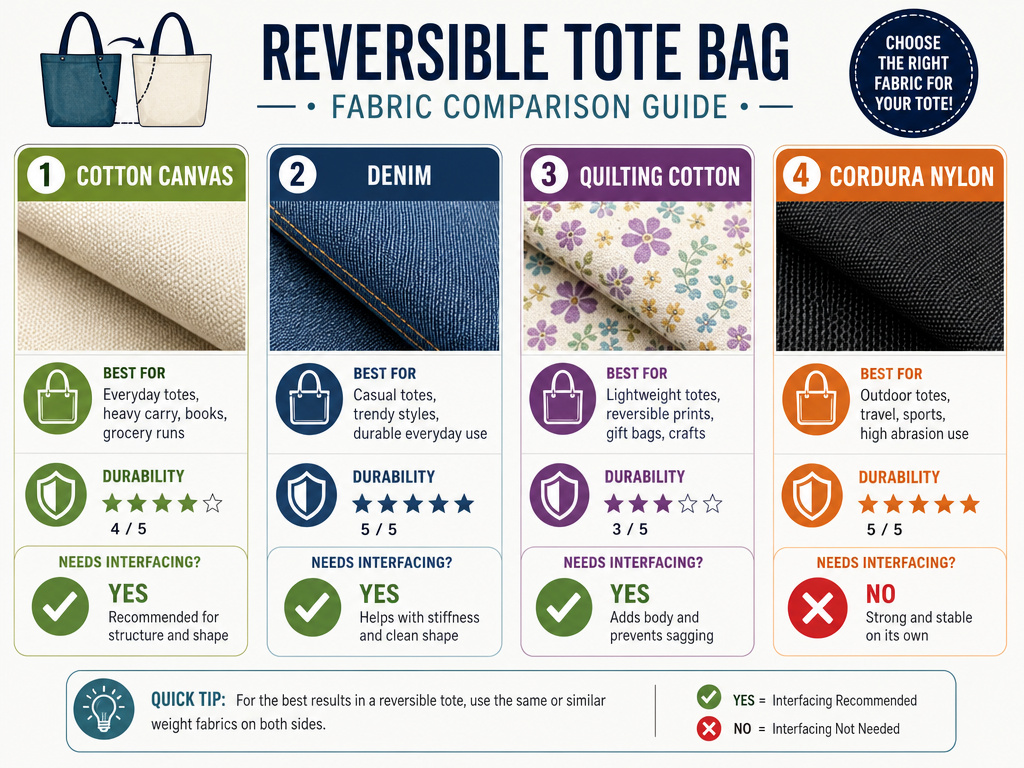
Your choices here determine the bag’s lifespan and look. This table breaks down the options.
| Fabric Type | Best For | Needs Interfacing? | Durability |
|---|---|---|---|
| Cotton Canvas | Everyday use, grocery runs, work bag | Yes, on one side | Excellent; withstands washing and weight. |
| Denim | Casual, sturdy everyday bag | Possibly, if denim is lightweight | Very high; abrasive but long-lasting. |
| Quilting Cotton | Lightweight, decorative bag | Mandatory, or it will sag | Moderate; prints fade with sun and wear. |
| Cordura Nylon | Ultimate durability, tech gear | No | Highest; waterproof and near-indestructible. |
For a first attempt, a canvas tote bag is the sweet spot. It’s forgiving, available everywhere, and responds well to interfacing.
Troubleshooting Common Reversible Tote Problems
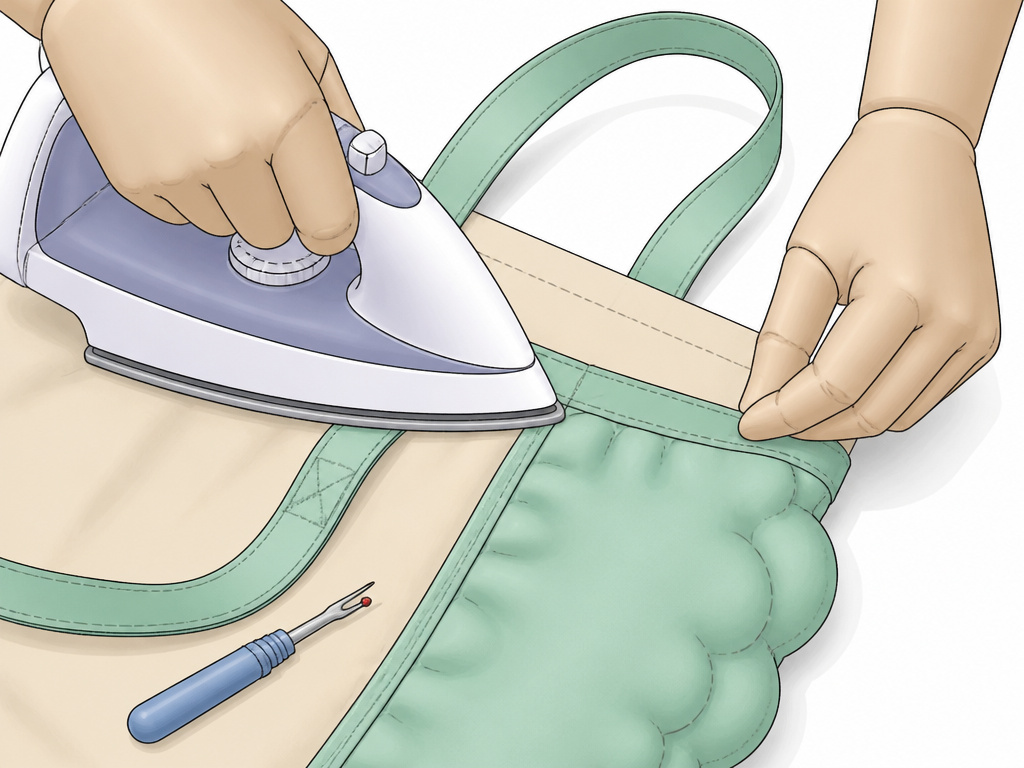
Even with careful sewing, things can go wrong. Here’s how to diagnose and fix the usual suspects.
- Problem: Bag doesn’t lie flat; one side bubbles out.
- Cause: Uneven tension while sewing the side seams or top seam.
- Fix: Press the seams aggressively open from the inside. If that fails, you can carefully topstitch around the top edge of the bag, which will flatten and secure the layers.
- Problem: Straps are twisting.
- Cause: The two fabric layers in the strap weren’t properly aligned before sewing, or the interfacing wasn’t fused evenly.
- Fix: This is hard to fix after construction. Prevention is key: press thoroughly after turning the strap and use ample topstitching.
- Problem: Gap at the turning hole is visible.
- Cause: The ladder stitch wasn’t pulled tight enough, or the seam allowances weren’t folded in fully.
- Fix: Gently pull the ladder stitch threads tighter. If a small hole remains, a tiny drop of fabric glue can secure it invisibly.
These solutions are the same for a lined tote bag, the principles of clean construction cross over.
Frequently Asked Questions
Can I make this bag without a sewing machine?
You can, but securing the straps and sewing the long side seams by hand is labor-intensive and the stitches may not withstand heavy weight. A machine is strongly recommended for durability.
What’s the biggest mistake people make with reversible tote straps?
They attach the straps with a single line of stitching. After a few weeks of carrying a laptop or groceries, that stitching line starts to pull away from the bag body. The reinforced box stitch with an ‘X’ is non-negotiable for a bag you plan to use hard.
How do I make my tote bag more structured?
Beyond interfacing, consider adding a base panel. Cut a rectangle of stiff craft interfacing or even thin plastic (like from a binder cover) to fit the bottom of your bag. Insert it between the fabric layers before you close the turning gap, and it will create a firm, flat bottom.
Can I add a zipper to this design?
Yes, but it changes the reversible nature. You would install the zipper in the top seam of one “shell” before joining the two sides. For a clean look, follow a dedicated tote bag with zipper tutorial. A zipper adds security but complicates the simple flip.
Is this a good project for a beginner?
Absolutely. It’s an ideal step up from a beginner tote bag. The techniques are foundational: straight seams, turning, topstitching, and hand-sewing. The clear measurements from the Mindy Makes pattern remove the guesswork.
The Bottom Line
A well-made reversible tote is more than two bags in one. It’s a lesson in precision sewing, where every seam allowance and stitch placement has a consequence. The Mindy Makes pattern works because its numbers are exact, from the 1.5-inch top seam allowance to the 2.5-inch strap placement.
Skip the interfacing and you get a slouch. Skip the box stitch and the straps fail. Offset the pockets and the bag carries evenly. This is the difference between following steps and understanding the craft. Start with canvas and Pellon SF101 interfacing, follow the measurements without deviation, and you’ll have a bag that stands up on its own, in more ways than one.