DIY Guide: How to Make a Durable Canvas Tote Bag Yourself
This post contains affiliate links. As an Amazon Associate, we earn from qualifying purchases.
To make a canvas tote bag, you need three precise things: the right weight fabric (10-12 oz canvas), a heavyweight denim needle (90/14), and seam allowances that match your pattern—commonly 1/4-inch for assembly and 3/8-inch for boxing corners. A finished size of 15.5 x 15 x 6.5 inches, like the BHG pattern, requires specific fabric cuts and fusible fleece for structure.
That specificity is the whole game. A quarter-inch deviation in a seam allowance or a switch to quilting cotton instead of canvas turns a sturdy carrier into a floppy sack after one heavy library run.
What follows is the build sheet for a bag that lasts: the exact fabric yardage from a primary source, the two needle types you actually need, and the step everyone skips that guarantees a flat bottom. We’ll also cover the serger shortcut, the lining versus unlined debate, and what to do when your machine starts protesting the thick layers.
Key Takeaways
- Use a 90/14 denim needle for canvas and vinyl. A universal needle will bend or break, often on the second side seam.
- Fusible fleece interfacing is non-negotiable for a structured bag. Skipping it saves five minutes but results in a bag that won’t stand up on its own.
- Clip, don’t pin, thick canvas and vinyl layers. Forcing pins through creates permanent holes and distorts the fabric alignment.
- Measure strap length on your body before cutting. The Janome pattern suggests 45-inch straps for a 23-inch drop, but your ideal length depends on whether you carry it on your shoulder or in your hand.
- A serger finishes raw edges cleanly inside an unlined bag, but a wide zig-zag stitch on a regular sewing machine works as a fallback.
The Tool Check: Your Machine Can Handle This
Can your sewing machine sew through four layers of 12-ounce canvas? Most modern home machines can, but they need the right setup. The wrong needle or thread turns a straightforward project into a jammed, broken mess.
You need a heavyweight denim needle, sized 90/14 or 100/16. Its sharp point pierces tightly woven canvas and vinyl without deflecting. A universal needle will struggle, bend, and likely snap. Pair it with all-purpose polyester thread for strength and a bit of stretch.
A 90/14 or 100/16 needle has a strong, sharp point intended for denim, tightly woven cottons like canvas, and nonwoven materials like vinyl and leather.
Your presser foot matters, too. A walking foot is the ideal upgrade for feeding multiple layers of canvas evenly without shifting. If you don’t have one, go slow and guide the fabric from the front and back. Relying solely on the feed dogs can cause the top layer to creep forward.
For cutting, fabric shears are essential. A rotary cutter and mat provide cleaner, straighter lines on canvas, which can be slippery. Finally, replace pins with quilting clips for thick layers. Pins leave holes and don’t hold the grip that clips do.
Cutting Your Fabric: More Than Just Scissors
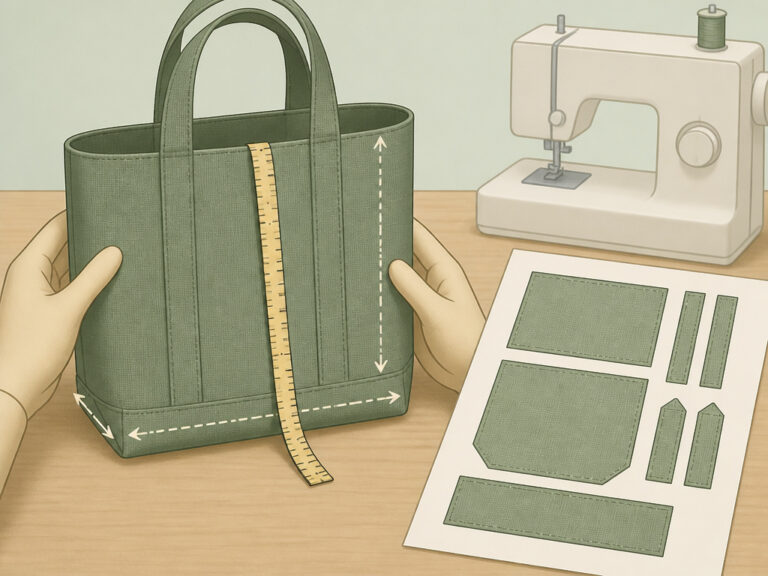
Precision here prevents a cascade of fitting problems later. The ubiquitous “15.5 x 15 x 6.5 inch” finished tote requires exact pieces. The best tote bag fabric is a 10-12 oz cotton canvas; lighter weights collapse under a load.
Based on the BHG project, here’s the cutting list for that specific size. All pieces are cut with the 22.5-inch length parallel to the selvage unless noted.
| Fabric Type | Piece Purpose | Dimensions (inches) | Quantity |
|---|---|---|---|
| Lining Fabric | Lining Panels | 18.75 x 22.5 | 2 |
| Faux Leather Vinyl | Bag Bottom & Trim | 6.75 x 22.5 | 2 |
| Faux Leather Vinyl | Handles | 3 x 22 | 2 |
| Natural Canvas | Bag Front & Back | 12.5 x 22.5 | 2 |
| Natural Canvas | Facing Strip | 1.75 x 22.5 | 2 |
| Fusible Fleece | Interfacing | 18.75 x 22.5 | 2 |
Why these sizes? The measurements include a 1/4-inch seam allowance on all sides. The bag bottom is vinyl for durability against abrasion. The canvas facing strip finishes the raw top edge cleanly after the lining is inserted.
If you’re following a different pattern, like the unlined Janome version, the pieces change. That design uses two coordinating canvas pieces (15.75” x 11.75”) for the body and a separate bottom panel. The principle is the same: transfer the pattern markings accurately and cut once.
Common mistake: Cutting pieces “close enough” without including the seam allowance. If your pattern says “cut to 12.5 inches” and that includes a 1/4-inch seam, cutting 12.25 inches means your finished panel will be a half-inch too small. There’s no recovering from that.
The Two Paths: Lined (BHG) vs. Unlined (Janome)
Your next decision defines the entire construction process: lined or unlined? A lined bag hides all raw seams inside a clean interior, often with added pockets. An unlined bag is faster to make but requires a method to finish the interior seams, typically with a serger.
| Aspect | Lined Tote Bag (BHG Style) | Unlined Tote Bag (Janome Style) |
|---|---|---|
| Interior Finish | Raw edges enclosed between canvas and lining. Clean look. | Raw edges serged or zig-zag stitched. Visible stitching. |
| Structure | Uses fusible fleece interfacing on lining. Very rigid. | Relies on canvas weight alone. Softer, more flexible. |
| Construction | Bag and lining made separately, then joined at the top. | Bag constructed as one unit; seams finished as you go. |
| Best For | Beginners, gift-giving, bags needing internal pockets. | Experienced sewists with a serger, quick afternoon projects. |
| Time | Longer (additional steps for lining and interfacing). | Shorter (fewer total pieces and steps). |
For a first project, the lined tote bag is more forgiving. Any wobbles in your straight stitching are hidden between the layers. The structure from the interfacing also makes the bag easier to handle during final assembly. You can follow a detailed tote bag with lining tutorial for this method.
The Janome approach is a clever hack. It uses a serger to finish the raw edges as you sew, resulting in a professional interior look without a lining. If you don’t own a serger, the pattern notes you can substitute a wide zig-zag stitch along the raw edges. It works, but it’s bulkier and less clean than a serged edge.
Assembling the Bag Body
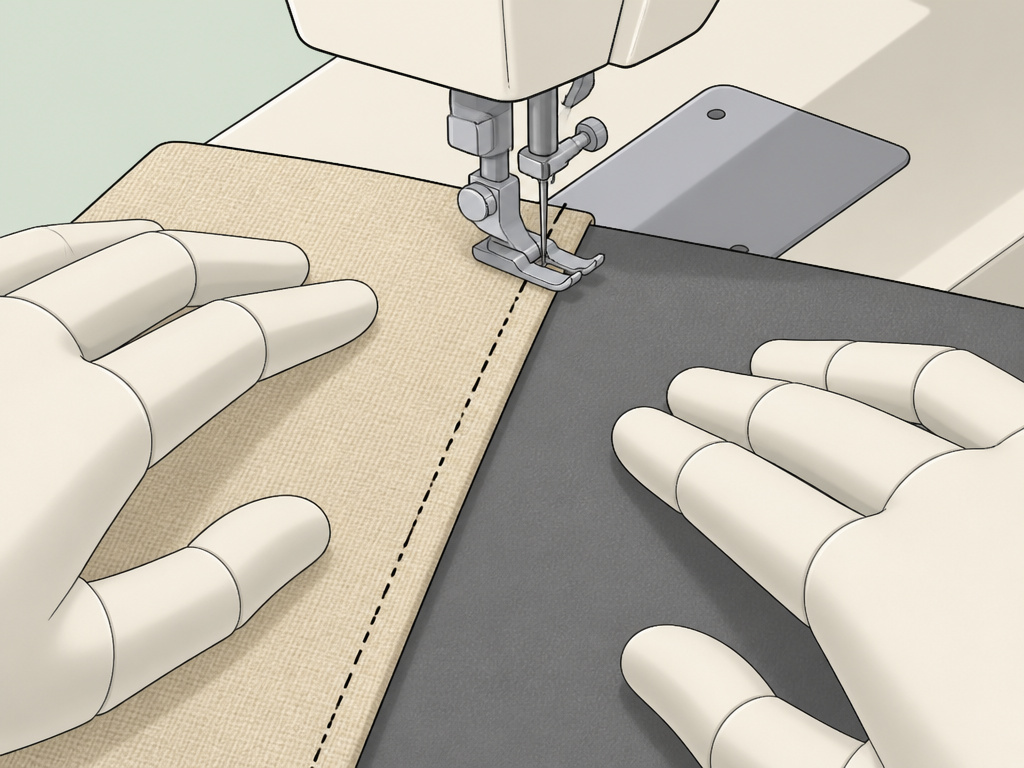 This is where flat pieces become a three-dimensional object. The process is identical for the outer bag and, if making a lined version, the lining itself.
1. Create the Side Panels. Take one canvas rectangle and one vinyl rectangle. Place them right sides together, aligning one long edge. This creates the bag side with a canvas top and durable vinyl bottom. Clip—don’t pin—the layers together.
2. Sew the Seam. Stitch along that long edge with a 1/2-inch seam allowance (note: this is larger than the standard 1/4-inch used elsewhere in this pattern). This extra width reduces bulk when you topstitch.
3. Topstitch for Strength. Finger-press the seam allowance toward the vinyl. On the right side of the vinyl, stitch a line 1/8-inch from the seam. This “stitch in the ditch” locks the seam down and adds a decorative detail. Repeat to make a second identical side panel.
4. Join the Panels. Place your two side panels right sides together, ensuring the vinyl segments align to form the future bag bottom. Clip around the three sides: the two long canvas/vinyl sides and the vinyl-only bottom. Leave the top (canvas-only) edge open. Sew with a 1/4-inch seam allowance.
You now have a fabric tube that is closed at the vinyl bottom. Turn it right side out. It still looks flat, because the next step creates the volume.
Boxing the Corners: The Step Everyone Rushes
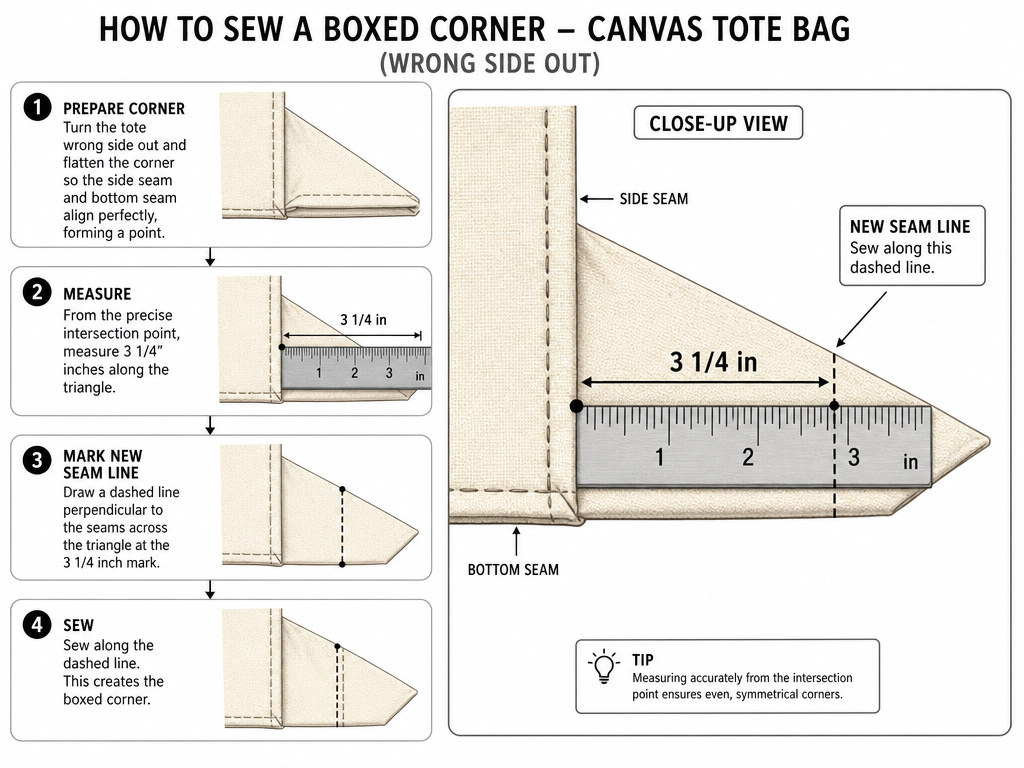 This is the single most important step for function. Boxing the corners transforms a flat-bottomed sack into a bag that can actually hold things without tipping over. The geometry is non-negotiable.
1. Align the Seams. With the bag body still wrong-side out, push a bottom corner out so the side seam and bottom seam are perfectly aligned, forming a point. Clip them together. You’ll see a triangle of fabric extending from the point.
2. Measure and Mark. According to the BHG pattern, measure 3 1/4-inches from the point of that triangle. Draw a line perpendicular to the seams across the triangle. This line is your new seam line.
3. Sew and Cut. Stitch directly on that drawn line. Then, cut off the triangle of excess fabric 1/4-inch away from your new seam. This reduces bulk. Repeat for the second bottom corner.
Where this goes sideways: Measuring from the wrong place. You must measure from the point where the seams intersect, not from the edge of the fabric. A mistake here gives you a lopsided, unstable bag.
The Janome pattern uses a different boxing method, cutting a 1 1/8” x 1 ½” rectangle from each corner before sewing. Both methods achieve the same goal: a flat, structured bottom. The BHG method is more common for lined bags, while the Janome cut-and-sew method is faster for unlined construction.
Adding Handles and Straps
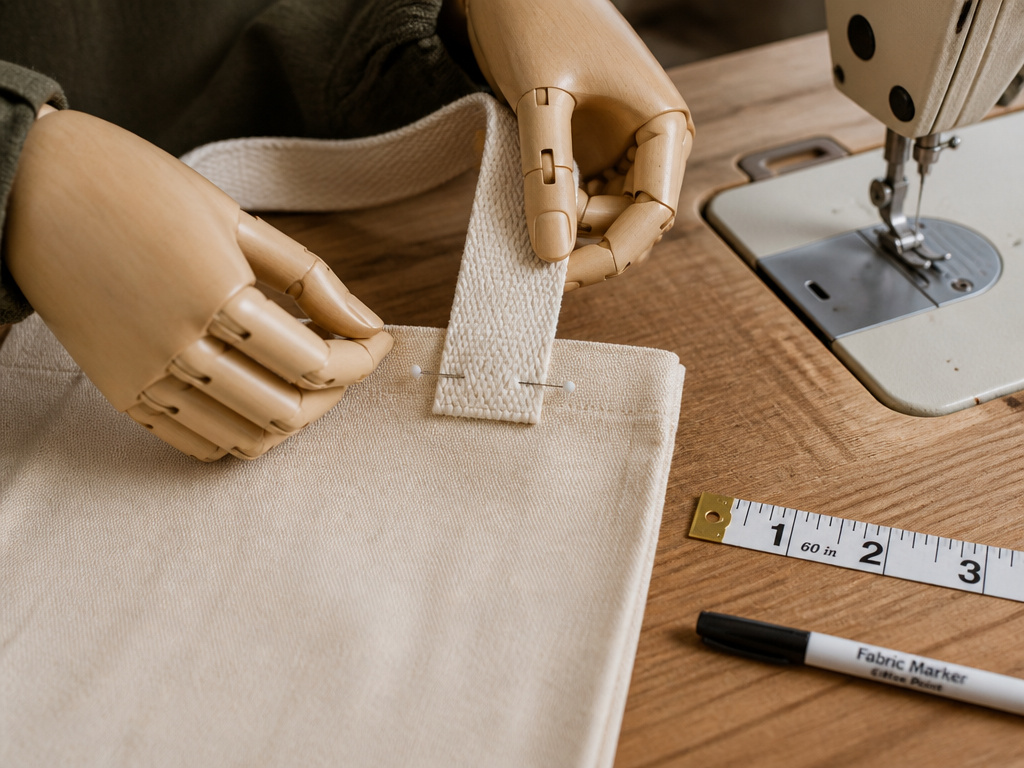 Comfort is dictated here. Too-short straps make the bag awkward to carry on your shoulder; too-long ones make it drag on the ground.
For Fabric Handles (BHG): Take your 3 x 22-inch vinyl strips. Fold each long side inward to the center, overlapping slightly, to create a strap about 1-inch wide. Clip and then sew three parallel lines of stitching along the length for reinforcement.
For Pre-made Strapping (Janome): This is the easier route. Use 1 ¼-inch wide cotton or nylon webbing. The pattern suggests starting with 45-inch lengths, which yield a 23-inch long strap after attachment. Here’s the critical part: test the length before you cut.
Pin one end of the strapping to the bottom of your bag body. Drape it over your shoulder. Mark where it feels right. Add a few inches for the attachment seam. That’s your custom length. Cut both straps to match.
Attaching Straps: For a clean look, straps are usually attached 2 inches in from the side seam. On the bag exterior, mark this point at the top edge. Place the strap end so it aligns with the mark and extends down the side of the bag. Topstitch a square or a series of parallel lines to secure it, stitching through all layers. This distributes the load-bearing stress over a wider area. Reinforce this attachment point with backstitching at the start and end.
Finishing: Lining, Facing, and Final Press
If you’re making an unlined bag, you’re nearly done. Turn it right side out, press the seams, and you have a functional tote.
For a lined canvas tote bag, you have a few more steps. You should have already constructed a lining bag identical to the outer bag (following steps 4 and 5), but without handles and using interfaced fabric.
1. Insert the Lining. Turn the outer bag right side out. Leave the lining wrong side out. Slip the lining inside the outer bag, so their wrong sides are together. Align the side seams and top raw edges perfectly. Clip around the entire top circumference.
2. Attach the Facing. This is the final professional touch. Take your two 1.75 x 22.5-inch canvas facing strips. Place them right sides together with the raw top edges of the bag-and-lining sandwich, enclosing the handle ends. Stitch all the way around with a 1/4-inch seam.
3. Finish the Facing. Press the facing and its seam allowance up, toward the top of the bag. Then, fold the facing to the inside of the bag and press again, creating a clean edge. Edgestitch along the top of the bag from the right side to secure the facing down. Give the whole bag a final, firm press with steam.
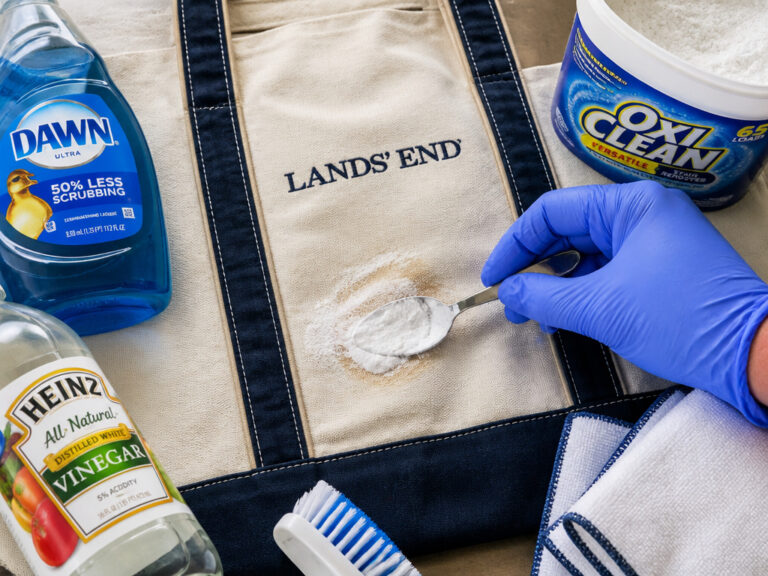
Your bag is complete. For long-term care, knowing how to properly wash a canvas tote bag will keep it looking new.
Frequently Asked Questions
What’s the best sewing machine for a canvas tote bag?
Most standard home sewing machines, like a Janome HD3000 or a Brother CS7000X, can handle two layers of canvas. For four layers at the seams, a machine with a stronger motor and a walking foot attachment is helpful. The project is more about the correct needle (90/14 denim) and patience than a specific machine model.
Can I make a tote bag without a pattern?
You can, but your dimensions will be guesswork. A simple basic tote bag pattern provides the necessary math for seam allowances, handle placement, and corner boxing. For a first bag, a pattern eliminates the “why is this weirdly shaped?” frustration.
My sewing machine is struggling with the thick layers. What should I do?
First, re-check your needle. It must be a new 90/14 or 100/16 denim needle. Second, slow down your stitching speed. Third, manually help the fabric through by turning the handwheel over the thickest spots (like where strap meets bag). For future bags, a walking foot is the definitive solution for feeding multiple layers evenly.
How do I add pockets to my canvas tote?
Pockets are easiest to add to the lining before you assemble the lining bag. Cut a rectangle of lining fabric, fold and press the top edge under, and topstitch it to the right side of a lining panel. Then proceed to construct the lining bag as normal. For an exterior pocket, like in the Janome pattern, attach it to the bag body panel before the side seams are sewn.
Is canvas hard to sew?
Canvas is straightforward but requires respect. It’s thick and can dull scissors quickly. Use sharp fabric shears or a rotary cutter. It also produces a lot of dust when cut, which can gum up your machine; clean the bobbin area after a big cutting session. The fabric itself is stable and doesn’t stretch, making it easier to sew straight lines than slippery satin or stretchy jersey.
The Bottom Line
Making a canvas tote bag succeeds or fails on three specifics: needle type, seam allowance, and corner boxing. Get those right, and you have a bag that carries groceries, books, or beach gear for years. The Janome Memory Craft 15000 or Brother ST150HDH are workhorses that won’t flinch at the layers, but a basic machine with a denim needle will get the job done.
Start with a lined version for the cleanest finish and the most forgiving process. Use the BHG pattern’s exact cuts for a 15.5 x 15 x 6.5 inch bag. Go slow at the thick seams, clip instead of pin, and press every step. That’s how you move from a pile of fabric to a tool you’ll actually use.