How to Sew a Tote Bag With Flat Bottom: Boxing Corner Method
This post contains affiliate links. As an Amazon Associate, we earn from qualifying purchases.
To sew a tote bag with a flat bottom, you need to use the boxing corner method. This involves cutting small squares from the bottom corners of your sewn bag panels, then sewing across those openings to create a three-dimensional box shape. The size of the square you cut determines the depth of your bag’s flat base, a 2-inch square yields a 4-inch deep bottom.
Most tutorials show the steps but skip the physical reality. Your first attempt will likely have one corner that puckers because you didn’t match the seams exactly. The fabric will fight you. That’s normal.
This guide walks through the boxing corner method from fabric choice to final press, including the handle reinforcement that prevents rips and the lining trick that hides all your seams.
Key Takeaways
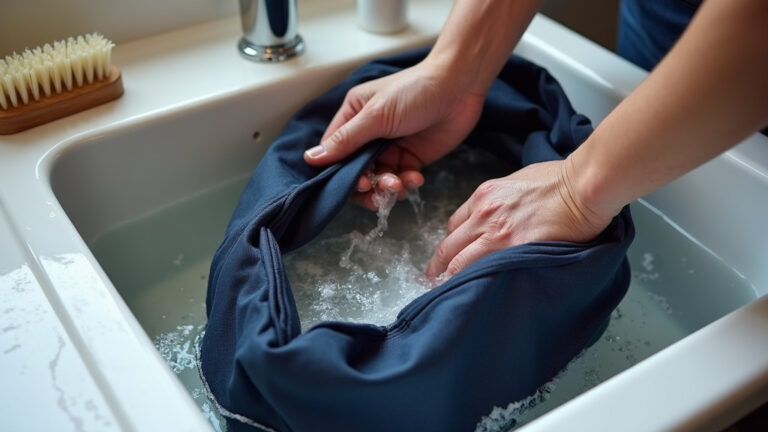
- Pre-wash your fabric. Skipping this step means your finished bag can shrink up to 5% in the first real wash, pulling handles unevenly.
- Use a 2.5mm stitch length on medium-weight fabrics like canvas. A longer stitch (3.2mm) on quilted or thick materials prevents puckering at the corners.
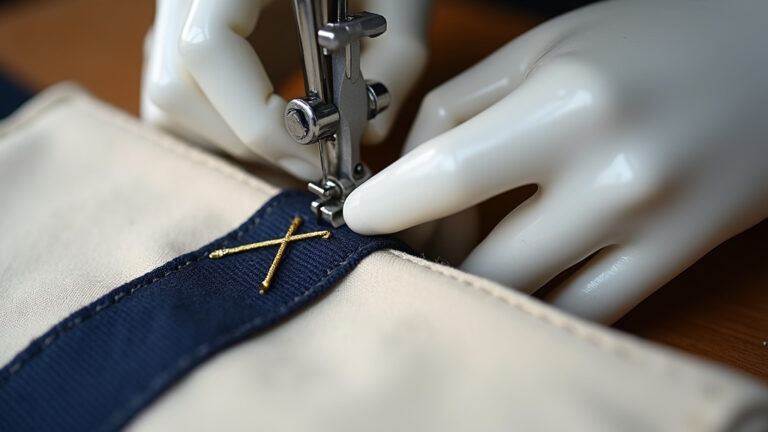
- Reinforce handle attachments with a box-with-X stitch pattern. A single straight line tears out after about 20 heavy carries.
- Boxing corners is not about cutting perfect squares. It’s about aligning the side seam perfectly with the bottom seam before you sew the triangle. Misalignment by a quarter-inch causes a twisted base.
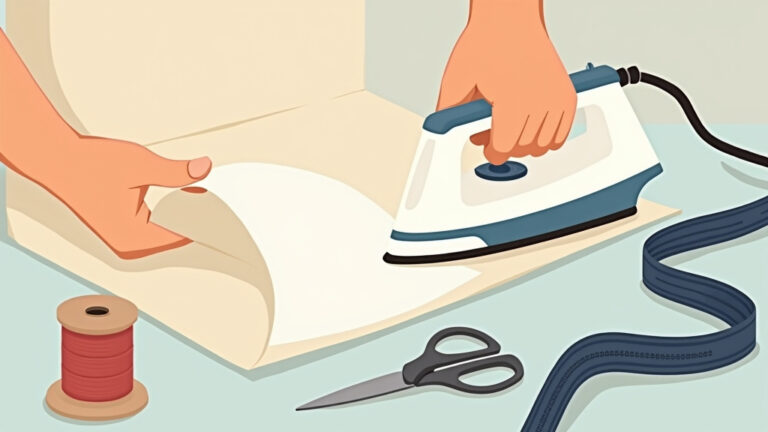
- Add fusible interfacing (Pellon SF101) to lighter fabrics like quilting cotton. Without it, your flat bottom will sag under a laptop’s weight within a week.
Why a Flat Bottom Wins Over a Flat Bag
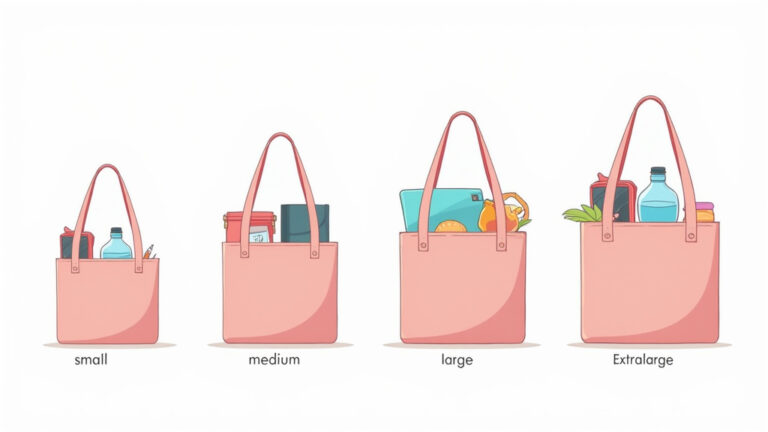
A standard tote bag is essentially a fabric bucket. It collapses around your groceries, your books, your tools. A flat-bottom tote stands up on its own. It creates usable vertical space inside the bag, things don’t pile into a messy heap at the bottom.
The flat bottom also distributes weight evenly. A loaded flat bag pulls downward on the handles, straining the attachment points. A boxed bag lets the weight sit on a defined base, which reduces shear force on the seams.
The boxing corner technique transforms a two-dimensional fabric rectangle into a three-dimensional carrier by removing small squares from the bottom corners and sewing the resulting flaps closed. This creates a structured base whose depth is twice the length of the removed square, a 2-inch cutout yields a 4-inch deep bottom.
I learned this after making a dozen flat totes for garden tools. They’d tip over, spilling trowels and gloves every time. The first boxed-corner bag I sewed stayed upright even when half-empty. The difference wasn’t just visual. It was functional.
TL;DR: A flat-bottom tote bag stands upright, organizes contents better, and handles weight more efficiently than a flat bag.
Fabric and Tool Selection: Weight Matters
Head design changes the entire process. Look at the business end of your trimmer. The head design changes the entire process. This isn’t about picking pretty fabric. It’s about matching material weight to what you’ll carry.
For a daily-use bag holding a laptop, books, or light tools, a 12-16 oz canvas or duck cloth is the starting point. Denim works if it’s 14 oz or heavier, the lighter 10 oz stuff stretches under load. Upholstery fabric offers pattern variety but check its composition; some are polyester blends that fray aggressively.
Quilting cotton is fine for a gift bag or a lightweight market tote. But you must interface it. Pellon SF101 fusible interfacing adds the necessary body. Without it, the bag will lose its shape after two uses.
Common mistake: Using quilting cotton without interfacing for a functional tote, the bag sides collapse inward after the first heavy load, and the flat bottom becomes a rounded sag within a day.
Your sewing machine needs a heavy-duty needle (size 90/14 or 100/16). A universal needle snaps on canvas when you hit a thick seam intersection at the boxed corner. The walking foot attachment is not optional for denim or layered canvas, it prevents the top layer from shifting and creating uneven corners.
Thread choice seems minor. It isn’t. All-purpose polyester thread works. But for heavy canvas, a bonded polyester thread (like Gutermann Mara) resists abrasion from the fabric’s rough weave. The first bag I made with regular thread showed frayed seams at the handle attachments after a month.
Here’s a quick spec table for fabric vs. use case:
| Fabric Type | Best For | Must-Add |
|---|---|---|
| 12-16 oz Canvas | Daily carry, laptop bag, tools | Heavy-duty needle, walking foot |
| 10 oz Denim | Light casual use | Interfacing for base |
| Quilting Cotton | Gift bags, light market totes | Pellon SF101 interfacing |
| Upholstery Fabric | Decorative bags, medium load | Check for fraying, use fray-check |
TL;DR: Match fabric weight to your load. Use a heavy-duty needle and consider a walking foot for thick materials.
The Boxing Corner Method Explained
Which square size matches a 4-inch deep base? A 2-inch square. The math is simple: the depth of your flat bottom is twice the length of the square you cut from the corner. So a 3-inch square creates a 6-inch deep base, great for a tall grocery bag.
The process starts after you’ve sewn the side and bottom seams of your two main panels. You have a fabric tube with an open top. Turn it wrong side out if you’re working with the seams inside.
At each bottom corner, measure and cut a square. Use a ruler and mark with chalk or a pencil. The cut removes the corner point, leaving a small opening.
Now, the critical alignment. Pinch that opening so the side seam aligns exactly with the bottom seam. They should meet perfectly, forming a triangle. If the side seam drifts left or right, your finished box will twist. Pin it flat.
Sew straight across the triangle’s base, about a quarter-inch from the raw edges. This seam closes the opening, forming the box corner. Trim the seam allowance to reduce bulk.
I won’t recommend skipping the pinning step for corner alignment. The visual feedback seems straightforward, but fabric layers slip. One misaligned corner makes the bag sit crooked on a table. Found that out on a bag meant for my son’s school books, it leaned left until I recut the square and resewed it.
Repeat for the second corner. Once both are sewn, trim the excess fabric from the seams you just created. This reduces bulk and lets the corners sit flat when you turn the bag right side out.
TL;DR: Cut squares from bottom corners, align side and bottom seams perfectly, sew across the opening, and trim seam allowance.
Attaching Handles: The Reinforcement That Prevents Rips

Handle length is a personal choice, but handle attachment is a structural one. A single straight line of stitching will hold for a while. Under repeated load, think a bag of gardening pots, a stack of hardcover books, that stitch line acts as a perforation. The fabric tears along it.
The reinforced box-with-X pattern distributes stress across a wider area. It’s a small square of stitching with an X inside it. This creates multiple anchor points, so a pull on the handle doesn’t focus on one thread line.
First, make your handles. Cut two fabric strips (for a 16-inch wide bag, 3 inches by 17 inches is comfortable). Fold each strip in half lengthwise and press. Then fold the raw edges inward to meet the center crease and press again. Topstitch along both long edges.
Position the handles on the outer bag. For a balanced look, place them about 3 inches from the side seams. Pin them securely.
Now, stitch the reinforced pattern. Start by sewing a small square around the handle end. Then stitch an X inside that square, crossing from corner to corner. Use a backstitch at the start and end to lock the threads.
Common mistake: Attaching handles with a single stitch line, the fabric begins to tear at the stitch holes after about 20 heavy carries, and a full rip occurs at the seam intersection within two months.
This takes extra time. It’s worth it. The first set of handles I attached with just a straight line failed on a bag carrying drill batteries. The repair required patching the outer fabric, a messy fix that never looked right.
TL;DR: Use a reinforced box-with-X stitch pattern to attach handles. This distributes load and prevents tearing.
Adding a Lining and Closure: The Professional Finish
A lining hides all the internal seams. It also adds a layer of fabric, which subtly strengthens the bag. You can use a lighter, contrasting fabric for the lining, cotton broadcloth works well.
The process mirrors the outer bag construction. Sew the lining panels together, box the corners, but leave a 4-inch opening in the bottom seam. Do not attach handles to the lining.
Once both bags are made, insert the outer bag into the lining. They should be right sides facing each other. Align the top edges carefully and pin all around.
Sew around the top edge. Then trim the seam allowance. Now, pull the entire bag through the 4-inch opening you left in the lining’s bottom seam. This magically turns the bag right side out, with the lining now inside.
Stitch the lining opening closed by hand or machine. Press the top seam thoroughly. The lining gives a clean interior and protects the outer fabric’s seams from abrasion.
For a closure, a magnetic snap is the easiest addition. Install it before you attach the lining. Place the snap halves on the front and back panels, centered and about 2 inches down from the top edge. Follow the snap’s instructions, usually involving punching small holes and clamping the parts.
Never install a magnetic snap after the lining is attached. The clamping mechanism pierces all layers, and if the lining is already in place, you’ll catch it unevenly and create a wrinkled spot inside.
A zipper is more secure but requires more steps. If you’re adding a zipper, consider using a dedicated zippered tote bag guide for detailed installation techniques. It involves creating a separate top panel with the zipper inserted before joining the main body.
TL;DR: Sew a separate lining, leave an opening in its bottom seam, join it to the outer bag at the top, and turn right side out through the opening for a clean finish.
The 7-Step Bump-Feed Replacement (and the One Step Nobody Skips)
Let’s walk through the full sequence. This assumes you’re using a medium-weight canvas and adding a lining.
- Pre-wash and cut. Pre-wash your outer and lining fabrics. Dry and press them. Cut two outer panels (16″ x 18″), two lining panels (same size), and four handle strips (3″ x 17″).
- Apply interfacing (if needed). If your outer fabric is light, fuse interfacing to the wrong side of the outer panels. Skip this for heavy canvas.
- Sew outer bag body. Place outer panels right sides together. Sew side seams and bottom seam with a 2.5mm stitch length. Leave top open. Repeat for lining panels, but leave a 4-inch gap in the bottom seam.
- Box the corners. On both outer and lining bags, cut 2-inch squares from each bottom corner. Align side and bottom seams, pin, and sew across the opening. Trim seam allowances.
- Make and attach handles. Fold and topstitch handle strips. Attach to outer bag with reinforced box-with-X stitch.
- Join lining to outer bag. Insert outer bag into lining (right sides facing). Align top edges, pin, sew around the top. Trim seam allowance.
- Turn and finish. Pull bag through the lining’s 4-inch opening. Stitch that opening closed. Press entire bag.
The step everyone tries to skip is pre-washing. Unwashed canvas can shrink unevenly. Your perfectly measured 16-inch width becomes 15.2 inches after the first rain exposure. The handles, attached at fixed points, now pull on distorted fabric.
If you skip pre-washing, the bag’s proportions shift after its first real-world moisture exposure. The flat bottom may pucker at one corner because the shrunken fabric tensions are unequal.
TL;DR: Follow the seven steps sequentially, and never skip pre-washing your fabric.
Canvas vs. Denim vs. Quilting Cotton: Which One Wins?
You have three common fabric choices. Each has a best-use case.
Canvas (12-16 oz) wins for daily durability. Its tight weave resists abrasion, and its weight provides structure without extra interfacing. It’s the go-to for a bag that will see rough use, tool carrying, book hauling, grocery trips. It’s also the easiest to sew with a heavy-duty needle and a walking foot.
Denim (14+ oz) wins for a casual, stiff bag. Heavy denim has inherent rigidity. It’s good for a structured look. But denim’s thickness creates bulky seams at the boxed corners. You need a strong machine and possibly a denim needle. Lighter denim (10 oz) loses quickly, it requires interfacing and still stretches.
Quilting Cotton wins for decorative, lightweight bags. It offers endless patterns and colors. For a gift bag or a light summer market tote, it’s perfect. But it must be paired with Pellon SF101 interfacing on all outer pieces. Without that, the bag is essentially a cloth sack with a temporary flat bottom.
The choice isn’t about preference. It’s about function. I used quilting cotton for a beach tote, interfaced it, and it held towels and sunscreen fine. I used 14 oz denim for a library bag, and the thick seams made my machine groan. Canvas is the reliable middle ground.
TL;DR: Canvas for daily durability, heavy denim for rigid structure, quilting cotton (with interfacing) for decorative light-use bags.
Frequently Asked Questions
What size square should I cut for a 5-inch deep bottom?
Cut a 2.5-inch square. The flat bottom depth is always twice the square’s side length. So a 2.5-inch cutout creates a 5-inch deep base. Mark the square carefully with a ruler before cutting.
Can I add a flat bottom to an already-sewn flat tote bag?
Yes, using the fold-and-sew method. Pinch each bottom corner of the finished bag to form a triangle. Mark a line 2-3 inches from the point (this sets the depth). Sew across that line. This adds a bottom without disassembling the bag, but the seams will be visible inside.
Do I need a serger to make a lined tote bag?
No. A serger trims and encloses seams quickly, but a sewing machine alone is sufficient. You can use French seams for a clean finish on the lining, sew a narrow seam first, then fold and sew again to encase raw edges. Our lined tote bag tutorial covers this technique.
How do I prevent my fabric from puckering at the boxed corners?
Use a longer stitch length (3.2mm) for thicker fabrics like denim or quilted material. Ensure you’re not pulling the fabric taut as you sew, let the feed dogs move it naturally. Puckering often happens when the thread tension is too high for the fabric weight; reduce tension slightly.
What’s the best way to add an internal pocket?
Add it to the lining before assembly. Cut a rectangle of lining fabric (e.g., 8″ x 6″). Fold and topstitch the top edge, then attach it to one lining panel by sewing around the three remaining sides. Do this before you sew the lining panels together. This keeps the pocket seams hidden inside the finished bag.
Can I use this method with very heavy fabric like waxed canvas?
Yes, but machine preparation is key. Use a size 100/16 needle, a walking foot, and bonded polyester thread. Go slowly at the boxed corners where multiple layers intersect. Consider hand-basting the corner alignment before machine sewing to prevent shifting. For a project using unique heavy materials, an upcycled tote bag project guide offers relevant tips.
Before You Go
Sewing a flat-bottom tote bag is a gateway project. It teaches precision cutting, seam alignment, and structural reinforcement. The boxing corner technique is simple once you align those seams correctly.
Choose your fabric based on what the bag will carry. Reinforce the handles every time. Add a lining for a clean finish and extra durability. Pre-wash your material, no exceptions.
The bag you make will stand up on its own. It will hold its shape under load. And it will last because you built it with the right steps.