How to Fold a Patagonia Black Hole Duffel: The Right Way
This post contains affiliate links. As an Amazon Associate, we earn from qualifying purchases.
To fold a Patagonia Black Hole Duffel, empty it, tuck all straps, open the integrated storage pouch, and compress the bag into a rectangle before rolling it tightly into the pouch. The process changes for wheeled models, which have internal aluminum rods you must disengage first. The real failure point isn’t the fold, it’s storing the bag compressed in a hot space, which makes the laminate brittle within a single season.
That laminate is a TPU-film layer bonded to 900-denier recycled polyester. It’s what makes the bag waterproof and abrasion-resistant. It’s also what fails when you treat it like a cotton sack and forget it in a hot car trunk or attic. The fold is just geometry. Storage is chemistry.
What follows: the exact seven-step sequence for soft-sided bags, the specific rod-removal process for wheeled versions, and the one environmental rule that decides whether your bag lasts five years or fifteen.
Key Takeaways
- Wheeled Black Hole Duffels have an internal aluminum skeleton; you must unzip the red internal tab and slide the rods out before folding, or you’ll stress the seams.
- Never store any Black Hole Duffel tightly folded in its pouch in a hot environment (car trunk, attic, near a heater). Heat plus compression creates permanent, brittle creases in the TPU laminate.
- Vary your fold pattern slightly each time. Consistently creasing the same lines accelerates wear on the fabric’s DWR (durable water repellent) finish.
- The integrated storage pouch is for short-term portability, not indefinite storage. For long-term health, store the bag flat under a bed or loosely rolled.
- The 70L model weighs 1,365g (3lbs) and the 90L weighs 1,417.5g; the extra heft is in the padded base and reinforced haul handles, which you must flatten during the fold.
The Standard 7-Step Fold (For Soft-Sided Bags)
The goal is to defeat the bag’s natural volume. You aren’t just compressing fabric; you’re managing three layers of structure: the burly outer shell, the internal lining, and the padded base.
Start with the bag completely empty. Unzip every compartment, including the small side pocket that doubles as the storage pouch. Pull out any loose lining material. This isn’t busywork. Left-behind socks or a charging cord create a lump that strains the zipper when you roll, and that strain translates to a torn lining seam after a dozen cycles.
Common mistake: Folding with items still in the side pockets. The uneven pressure points stress the zip seams on the main compartment, and the zipper will start to catch within three or four folds.
Follow this sequence. The order matters because each step preps the material for the next compression.
- Lay the bag flat on its back. Position it so the main compartment zipper is facing up and the padded base is toward you. Flatten the base by pressing down firmly along its entire length, this is the stiffest part of the bag and needs to be pre-bent.
- Tuck every strap inside. Feed the removable shoulder strap, haul handles, and any daisy-chain webbing into the main compartment. Leaving them outside turns them into anchors that fight the fold.
- Open the storage pouch fully. Unzip the side pocket and pull its interior fabric out completely, turning it inside out. It should look like a separate, floppy bag attached to the duffel.
- Create a rectangle. Grab the left and right sides of the duffel and fold them inward toward the center, like closing a book. You should now have a long, narrow, pillow-shaped bundle. Press down to expel air.
- Fold in thirds. Take the bottom third (the end with the base) and fold it up toward the center. Then fold the top third down over it. You now have a thick, roughly square packet.
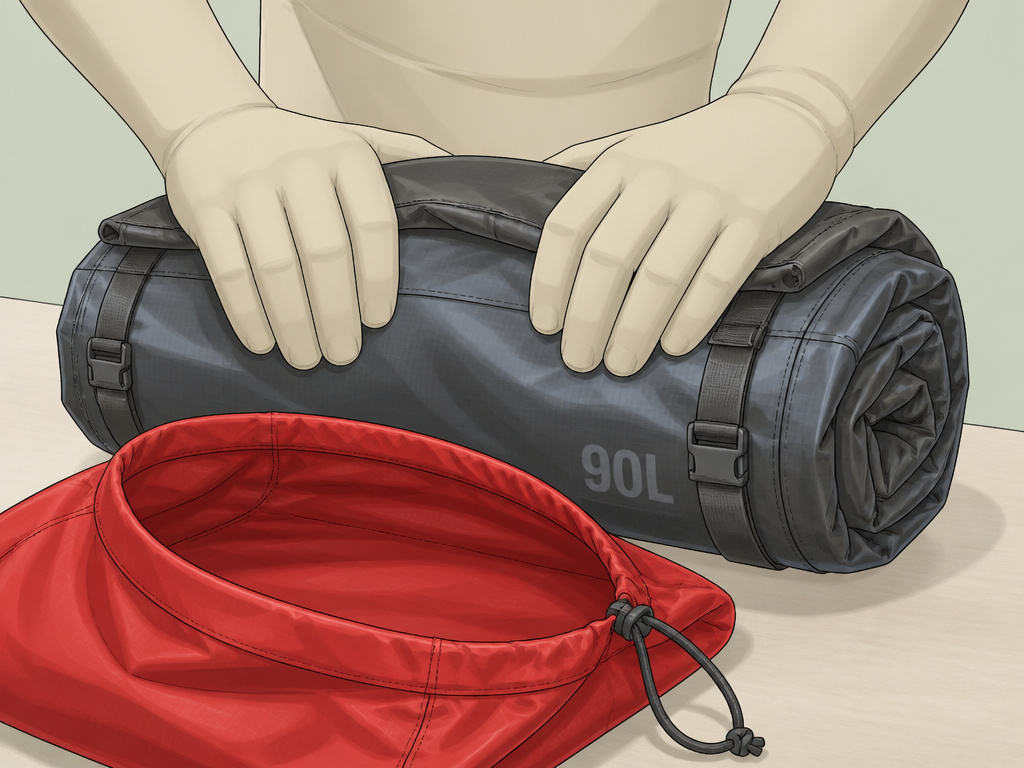
- Roll toward the pouch. Starting from the end opposite the storage pouch, tightly roll the packet. Apply even pressure. You’ll hear a slight crinkling sound from the TPU laminate, that’s normal.
- Stuff and zip. Insert the rolled bundle into the open storage pouch. It will be a tight fit. Use the heel of your hand to push it all the way in, then zip the pouch closed.
The first time you do this, it’ll take three minutes. By the fifth time, it’s a 45-second job. The resistance you feel is the material working as designed.
Wheeled Black Hole Duffels: The Internal Skeleton
A wheeled Black Hole Duffel is a different animal. It has a rigid base panel and a frame of thin aluminum rods running through webbing sleeves to provide vertical stability for upright rolling. These rods are designed for load-bearing, not lateral bending.
If you try to fold a wheeled bag using the standard seven-step method, you will stress the internal seams where the rod sleeves attach to the liner. The bag might not rip on the first try, but the repeated stress will weaken those points. The fix is a two-minute disassembly.
Where this goes sideways: Forcing a wheeled bag to fold like a soft-sided one. The aluminum rods cannot bend, so the force transfers to the fabric seams, stretching them permanently.
Look inside the main compartment. Near the top, you’ll find a red fabric tab with a zipper pull, often labeled “unzip to repair.” This is your access point.
| Step | Action | What Happens If You Skip It |
|---|---|---|
| 1. Unzip the red tab. | Fully unzip the red fabric access panel along its length. | The rods remain captive. Any folding attempt puts direct pressure on the rod tips against the webbing sleeves. |
| 2. Locate the rod ends. | Feel inside the webbing sleeves for the smooth, rounded ends of the aluminum rods. | You risk pushing the rods deeper into the sleeve, making them harder to retrieve without pliers. |
| 3. Push rods out gently. | Use your thumb to push each rod out of its sleeve, toward the center of the bag. Let them drop into the main compartment. | Forcing the rods can bend them. A bent rod won’t slide back in smoothly, compromising the frame’s integrity. |
| 4. Remove rods (optional). | For the neatest fold, take the rods out completely and set them aside. | Leaving them inside creates a stiff, unyielding bundle that’s harder to roll into the pouch. |
| 5. Proceed with standard fold. | With the rods removed, the bag is now a soft-sided duffel. Follow the 7-step sequence above. |
When reassembling, slide the rods back into their sleeves before zipping the red tab closed. The system is serviceable by design, a hallmark of Patagonia’s repair-friendly ethos.
Why Material Care Dictates the Fold
You aren’t folding canvas. The Black Hole fabric is a 15-oz, 900-denier polyester ripstop with a TPU-film laminate and a DWR finish. The laminate provides waterproofing but has a specific failure mode under heat and pressure.
Think of the TPU layer like a stiff, protective skin. When you fold the bag, you’re bending that skin. When you store it folded tightly in its pouch, you’re holding that bend under constant pressure. Add heat, from a sunny garage, a car trunk, or a radiator, and the plasticizer in the TPU begins to migrate. The material loses its suppleness at the crease points.
A user reported storing a Black Hole Duffel folded in its pouch in a hot garage for one summer. The result was deep, brittle creases that wouldn’t relax, and the material felt noticeably stiffer and less waterproof along those lines.
This is why the “stuff pouch” is for portability, not archival storage. Patagonia’s own demo videos show the pouch fold because it’s clever marketing for a travel feature. For long-term storage, you want to relieve all pressure.
For storage longer than a month:
- Best: Lay the bag flat under a bed or on a shelf.
- Good: Loosely roll it (without using the pouch) and place it in a larger, breathable storage bin.
- Avoid: The storage pouch, attics, car trunks, and any space that gets consistently hot.
Varying your fold pattern also helps. If you always create the same creases, you’re repeatedly stressing the same microscopic fibers in the ripstop and the same section of laminate. Shift the fold lines by an inch or two each time. It distributes the wear.
Choosing and Using Your Black Hole Duffel
The fold is one skill. Picking the right bag for how you travel is another. The Black Hole line isn’t a single product; it’s a system of capacities and formats.
| Model | Best For | Key Consideration for Folding & Use |
|---|---|---|
| 40L / 55L | Carry-on travel, weekend trips. | These sizes fold into the smallest pouch. The 40L is a common pick for a carry-on duffel bag. |
| 70L | Week-long trips, bulky gear hauling. | At 1,365g, it’s dense. The extra material makes the final roll into the pouch a tighter fit. |
| 90L / 100L | Extended travel, moving bulky items. | The large volume requires the most aggressive compression during the fold. Not carry-on compliant. |
| Wheeled 70L/100L | Avoiding shoulder strain, airport corridors. | Requires the rod-disassembly step. The rigid base will not fold, only flex slightly. |
The classic duffel bag design is a trade-off. You get a large, simple cavity perfect for using packing cubes or stuffing odd-shaped gear. You lose the organization of a suitcase. The Black Hole’s internal compression straps and lid pockets are the compromise.
Before you buy, verify your intended duffel bag size against airline carry-on requirements. A packed 55L bag can often squeak under the seat, but a stuffed 70L will need the overhead bin. Our guide to carry-on duffel size has the specifics.
Frequently Asked Questions
Can you machine wash a Black Hole Duffel?
No. Do not machine wash or dry-clean it. The agitation and heat can delaminate the TPU coating from the polyester. For cleaning a duffel, use a damp cloth with mild soap, spot clean stains, and air dry completely away from direct heat before storing.
How do you fix a creaky or stiff zipper?
The YKK zippers are heavy-duty but can collect grit. Wipe the teeth clean with a dry cloth. Then, run a graphite pencil (not a lubricant or oil, which attracts dirt) along the teeth. The graphite acts as a dry lubricant. If the zipper still catches, check for a bent tooth or fabric caught in the slider.
Is the storage pouch replaceable?
Yes, but not as a separate part. If the pouch zipper fails or the fabric tears, your option is Patagonia’s repair service. This is a strong argument for not over-stressing it. Use the pouch for short-term compactness, not as a permanent compression sack.
How does the Black Hole compare to other travel duffel bags?
Its signature is the laminate fabric and the integrated pouch. Competitors like the Osprey Transporter also pack into themselves, but often use lighter materials. The Black Hole is heavier, more abrasion-resistant, and has a distinct, crinkly hand-feel. For a hybrid option, look at duffel backpacks from brands like The North Face.
My bag has a musty smell after storage. What now?
This means it was stored damp, a cardinal sin. Unfold it completely and leave it in a well-ventilated area for at least 48 hours. If the smell persists, lightly spray the interior with a 50/50 mix of white vinegar and water, then air dry again. Never store the bag until every layer is bone-dry.
The Bottom Line
Folding a Patagonia Black Hole Duffel is straightforward mechanics. The real expertise is in knowing when not to fold it. Use the pouch for tucking the bag into a locker or a bigger suitcase. The moment your trip ends, take it out, let it breathe, and store it flat.
The bag’s durability comes from its 900-denier fabric and Bluesign®-approved materials. That durability assumes you won’t bake it while it’s under tension. Follow the rod-removal drill for wheeled versions, vary your crease lines, and keep it cool. Do that, and the best duffel bags list will always have your Patagonia on it.