How to Make a Tote Bag with a Zipper: The Zipper Sandwich Method
This post contains affiliate links. As an Amazon Associate, we earn from qualifying purchases.
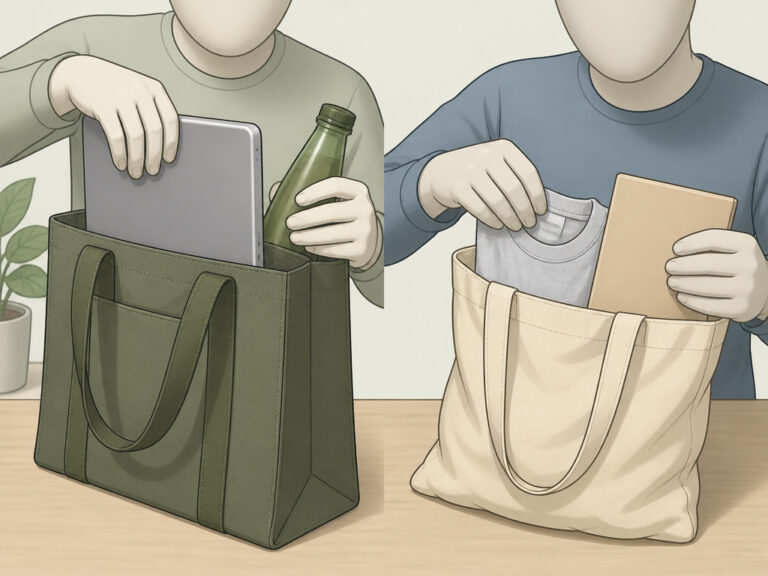
Making a tote bag with a zipper requires three things: a recessed “sandwich” method for the zipper panel, precise cutting for gusset depth, and a 6-inch gap left in the lining seam for turning. The zipper sits between a top lining strip and the main bag body, sewn with a zipper foot. This creates a clean, secure closure that protects your belongings.
That recessed panel is the whole game. It tucks the zipper teeth down inside the bag’s profile so the pull doesn’t catch on everything and the closure looks integrated, not tacked-on. Most frustration happens at the sewing machine, when the zipper pull blocks the needle or the lining gets sewn shut.
What follows: the measurements that decide your bag’s final size, the exact sequence for the zipper sandwich, and the assembly steps that transform flat pieces into a structured tote. We’ll name the tools that make it reliable.
Key Takeaways
- Use the “sandwich” method: place the zipper right-side-up on the bag piece, then lay a contrasting fabric strip right-side-down on top. Sew, flip, and topstitch.
- Open the zipper halfway before you sew the final side seams. If you forget, the bag cannot be turned right-side-out.
- Leave a 6-inch gap in the lining’s bottom seam. This is your only access point for turning the entire bag after assembly.
- Match your upper thread to the outer fabric and your bobbin thread to the lining. This hides stitching imperfections on the inside.
- For a structured finish, interface your outer fabric with fusible fleece or craft stabilizer. Skip it for a soft, slouchy bag.
The Measurements That Decide Everything
Your bag’s final dimensions are locked in the moment you cut your fabric squares for the gussets. This isn’t abstract design. It’s arithmetic.
The width of the square you cut from each bottom corner directly sets the bag’s depth. The common guidance is right, but it’s rarely explained. If you cut a 2-inch square from each corner, the finished bottom width will be 4 inches. The rule is: finished bottom width = 2 x cut square size.
The part nobody mentions: That cut also reduces the bag’s final height by the same amount. A piece cut 13 inches tall with 2-inch corner squares yields an 11-inch tall bag. Your pattern must account for this shrinkage.
Popular patterns prove the point. The OnlineFabricStore Maker’s Mill tote uses 2-inch squares for a 4-inch deep, 11-inch tall bag. The JMB Handmade recessed zipper tote uses 2.5-inch squares for a 5-inch deep bag. These aren’t arbitrary.
| Pattern Source | Corner Square Cut | Finished Bag Depth | Finished Height |
|---|---|---|---|
| OnlineFabricStore | 2 inches | 4 inches | 11 inches |
| JMB Handmade | 2.5 inches | 5 inches | 13 inches |
| Half Yard Club | (Not specified) | 3 inches | 12 inches |
Your outer fabric needs to be sturdy. Canvas, denim, duck cloth, or decorator fabric work. For a lined tote bag, the lining can be lighter—quilting cotton or a fun print. If you plan to wash the bag, pre-wash all fabrics first.
The Core “Zipper Sandwich” Method
This technique attaches the zipper so it’s recessed, with fabric covering the teeth on the inside and outside. It’s the standard for a professional look.
You need a zipper foot. A standard presser foot cannot sew close enough to the zipper teeth. The zipper should be at least 2 inches shorter than the width of your bag’s top edge; an 18-inch zipper is common for a bag around 22 inches wide.
The zipper is measured from the top metal stop to the bottom metal stop. The width of your fabric should be 1.5 inches wider than the length of your zipper. JMB Handmade Recessed Zipper Tote Tutorial
Here is the sequence. Get it wrong, and the zipper will be crooked or the fabrics won’t align.
- Cut your zipper panel strips. These are the fabric pieces that will frame the zipper. They should be the same width as your main bag body pieces and about 2.5 to 3 inches tall.
- Assemble the sandwich. Place your main bag body piece right-side-up. Lay the zipper right-side-up on top, aligning its top edge with the fabric’s top edge. Place one zipper panel strip right-side-down on top of the zipper. Pin through all three layers.
- Sew with the zipper foot. Use a ½-inch seam allowance. Start sewing. When you approach the zipper pull, stop with the needle down. Lift the presser foot, slide the pull behind the foot, lower the foot, and continue. This prevents a jam.
- Flip and topstitch. Fold the zipper panel strip away from the body piece, so the right sides are now out. Press the seam. Topstitch about ⅛-inch from the fold, securing the panel and creating a clean finish.
- Repeat for the other side. Place the other main body piece right-side-up. Lay the other side of the zipper right-side-up on it. Place the second panel strip right-side-down. Sew, flip, and topstitch.
You now have a single unit: your bag’s front, back, and zipper, all connected. This is the most common point of failure in a basic tote bag tutorial. Rushing the topstitching leads to a wavy, puckered zipper.
Cutting and Preparing the Rest
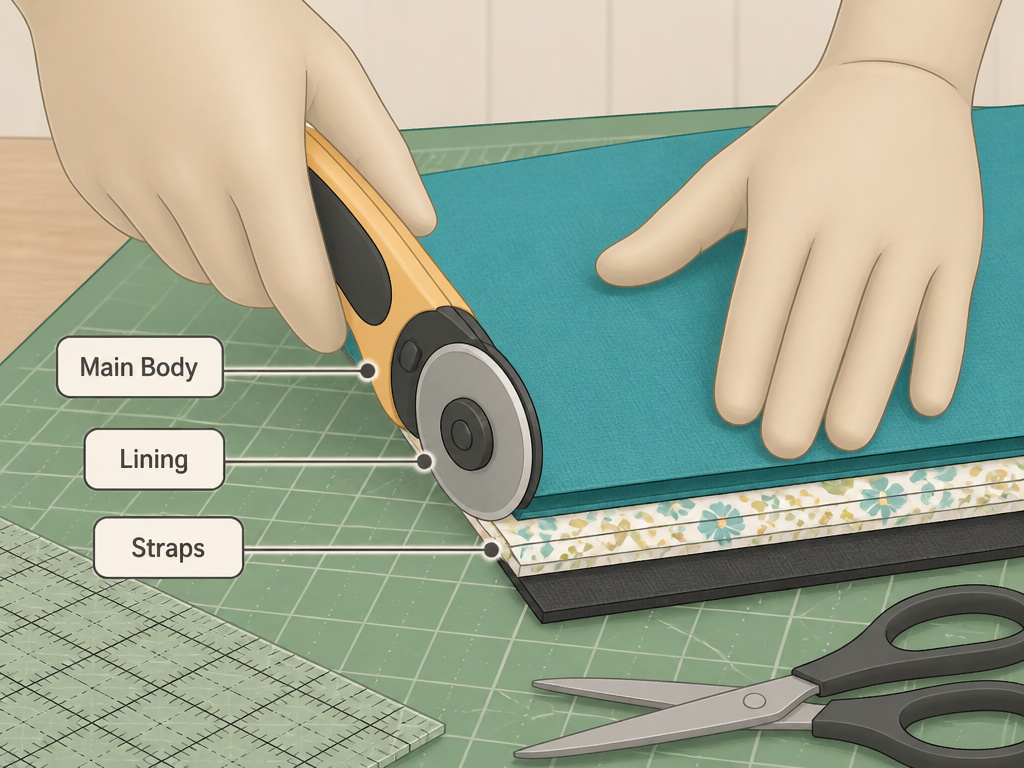 With the zipper panel done, cut the remaining pieces. Accuracy here saves frustration later.
- Main Outer Body: Two pieces. Dimensions = (Desired Finished Width + 1 inch) x (Desired Finished Height + 2.5 inches).
- Lining: Two pieces, identical in size to your Main Outer Body pieces.
- Straps: Two pieces. (Desired Finished Strap Length + 1 inch) x (Desired Finished Strap Width x 4). For 1-inch wide, 50-inch long straps, cut two pieces 51 inches by 4 inches.
- Interfacing/Fleece: Cut to match your Outer Body pieces if using. Fusible craft fleece adds structure and body.
Reinforce the strap fabric with interfacing. A floppy strap ruins the bag’s carry. For a quilted tote bag, this is where you’d baste your outer fabric to batting and quilt it before cutting.
Common mistake: Skipping strap interfacing. A 4-inch wide fabric strip folded into a 1-inch strap has zero inherent stiffness. After two uses, it stretches and twists permanently.
Assembling the Bag Body and Lining
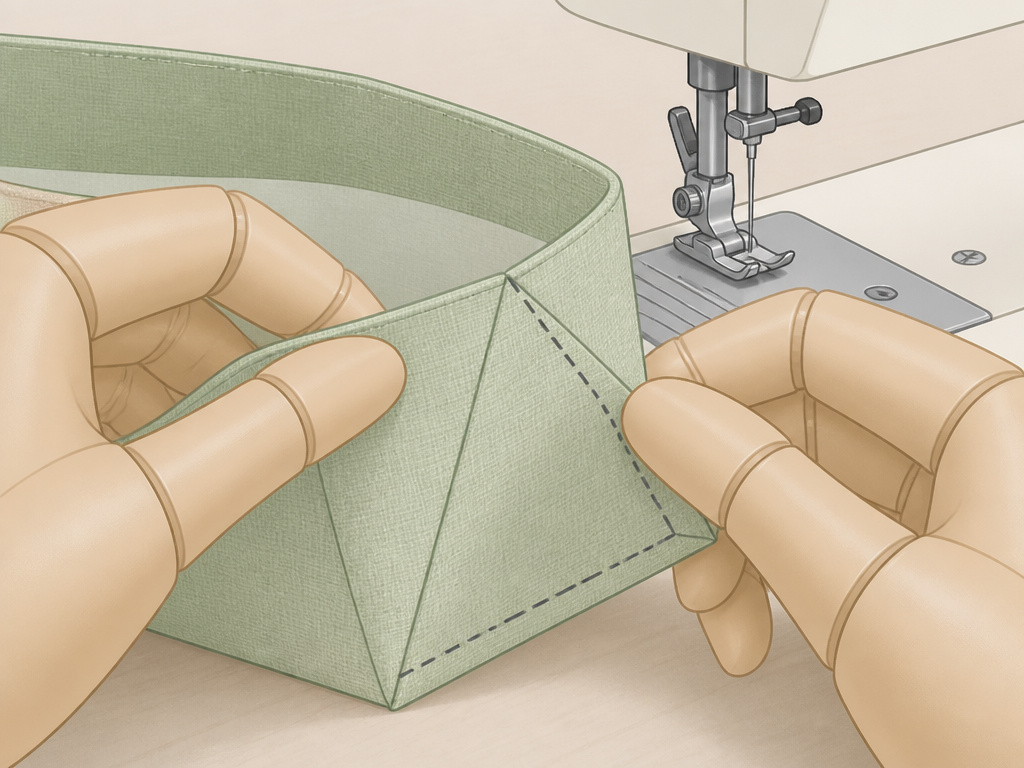 This stage transforms your pieces into three-dimensional shapes. The process is the same for the outer bag and the lining, but with one critical difference.
For the Outer Bag:
- Place your two outer body pieces (with the zipper panel attached) right sides together.
- Sew the side seams using a ½-inch allowance. Stop at the corner square marks.
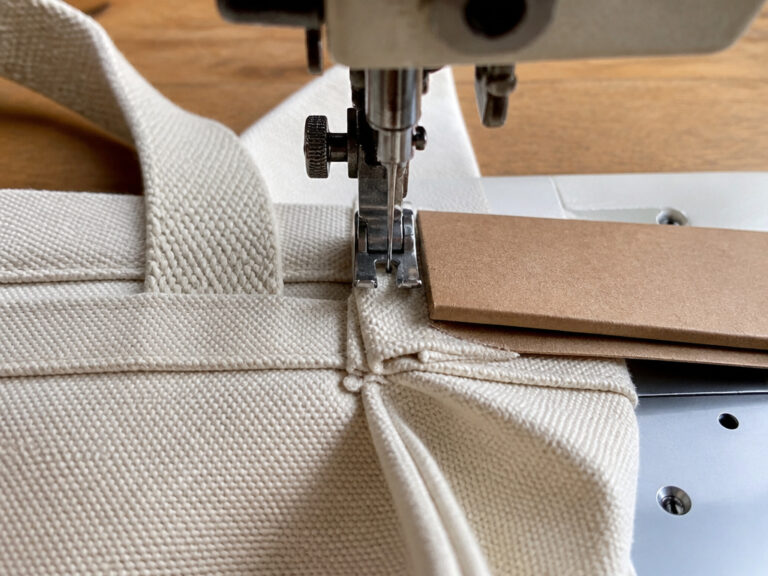
- Box the corners. Match the side seam to the bottom seam at each cut corner, forming a triangle. Sew across the triangle at the marked seam allowance line. This creates the gusset. Repeat for all four corners.
- Press the seams open. Turn the outer bag right-side-out and set it aside.
For the Lining:
- Place the two lining pieces right sides together.
- Sew the side seams, identical to the outer bag.
- Box the corners identically.
- Here is the non-negotiable step: When sewing the bottom seam of the lining, leave a 6-inch gap in the middle. Do not sew this section closed. Backstitch at both ends of the gap.
- Press the seams. Leave the lining wrong-side-out.
The lining gap is your only access hatch. Forget it, and you will have to rip out a finished seam later.
The Final Assembly and Turn
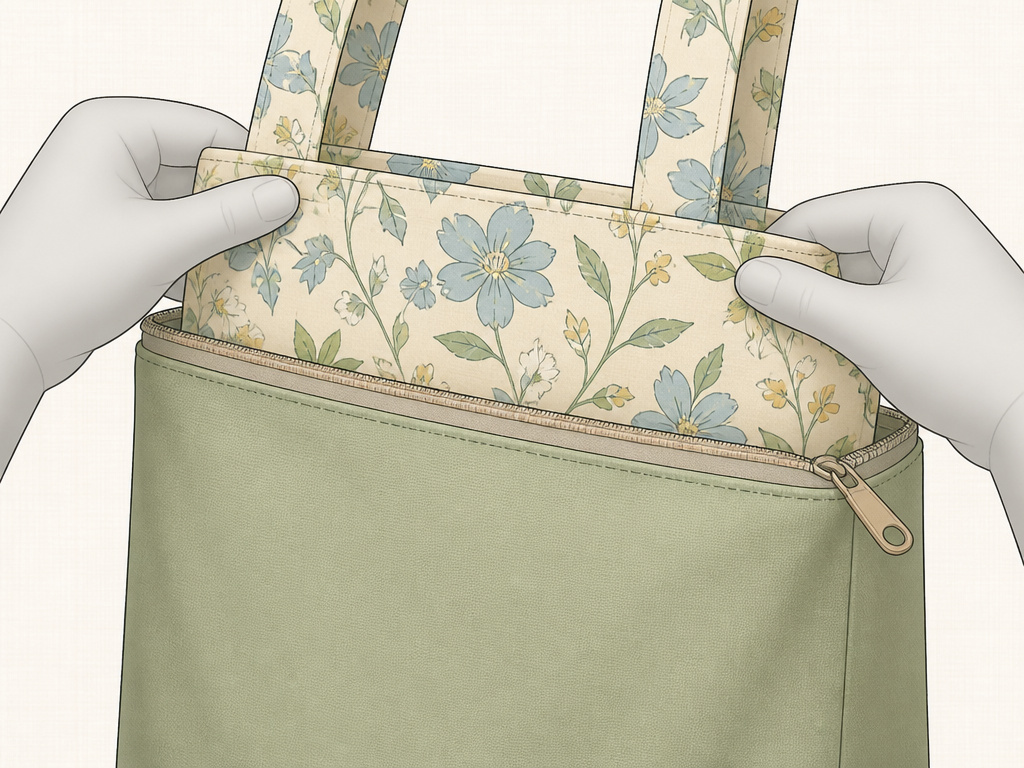 Now you combine the outer shell and the lining. It feels counterintuitive, but it works.
- Tuck the outer bag inside the lining. Your outer bag is right-side-out. Your lining is wrong-side-out. Place the outer bag down inside the lining bag. Their right sides should be facing each other.
- Align the top edges. Match the side seams and the zipper ends. The zipper should be partially open. Clip or pin all around the top circumference.
- Sew around the top. Using a ½-inch seam allowance, sew all the way around the bag’s top edge. Go slowly over the zipper ends and strap attachments. Reinforce these points with a few backstitches.
- Turn the bag right-side-out. Reach through the 6-inch gap in the lining’s bottom seam. Pull the entire outer bag through this gap. It will emerge, right-side-out, with the lining now tucked inside it.
- Close the lining gap. Tuck the raw edges of the 6-inch gap inward. Hand-stitch it closed with a ladder stitch, or machine-stitch it close to the edge.
- Push the lining into the bag. Once the gap is closed, push the entire lining down into the outer bag. Adjust so it sits smoothly.
- Final topstitch. Press the top seam. Topstitch around the entire top of the bag, about ⅛-inch from the edge. This secures the lining and gives a polished finish.
The moment you pull the bag through that gap and see it take shape is the payoff. If the zipper is open and the corners are poked out sharply, you’ve done it right.
Fabric, Stabilizer, and Tool Choices
Your material choices dictate the bag’s character and durability. This isn’t just about color.
Outer Fabric:
- Canvas or Duck Cloth: The default for a durable tote bag. Holds shape well, readily available.
- Decorator Fabric: Heavier weight, often stain-resistant. Perfect for a structured, washable bag.
- Nylon or Packcloth: For a lightweight, water-resistant option. Slippery to sew—use clips, not pins.
Lining Fabric:
- Quilting Cotton: Easy to sew, infinite patterns. Use for a classic lined tote bag.
- Ripstop Nylon: Ultra-lightweight and strong. A technical choice for a stuffable bag.
- Flamellette: Adds a soft, cozy feel for a market bag.
Stabilizers (Optional but Recommended):
- Fusible Fleece (H630): Adds lightweight body and a slight cushion. Fuse to the wrong side of the outer fabric before cutting.
- Craft Stabilizer (Peltex or Timtex): Creates a rigid, structured shape. Often used in a flat bottom tote. Can be sewn in as a separate layer.
- Lightweight Interfacing: For stabilizing quilting cotton or other loose weaves without adding bulk.
Essential Tools:
- Zipper Foot: Non-negotiable.
- Heavy-Duty Needle (size 90/14 or 100/16): For canvas, denim, or multiple layers.
- Clips or Wonder Clips: Hold thick layers better than pins.
- Seam Ripper: You’ll use it. Accept it.
- Chalk or Disappearing Ink Marker: For marking corner squares and strap placement.
If you’re moving from a simple tote bag to this project, the zipper foot and the patience to manage the zipper pull are your only new skills. The rest is the same careful sewing.
Frequently Asked Questions
What size zipper do I need for a tote bag?
The zipper should be 2 to 4 inches shorter than the finished width of your bag’s top. For a bag 22 inches wide, an 18-inch zipper is ideal. Your fabric for the zipper panel should be 1.5 inches wider than the zipper’s length. A 22-inch wide bag needs panel strips about 23.5 inches wide.
Can I add a zipper to an existing tote bag?
Yes, but it’s a different process. You need to unpick the top seam, create a new zipper panel, and insert it. It’s often more work than starting fresh. We have a dedicated guide on how to add a zipper to an existing bag that walks through the exact steps.
How do I keep the zipper pull out of the way while sewing?
Stop with the needle down in the fabric, lift the presser foot, and manually slide the zipper pull behind the foot along the zipper tape. Lower the foot and continue sewing. This is a standard step in any professional zipper installation.
My bag won’t turn right-side-out. What did I do wrong?
You forgot to open the zipper before sewing the final top seam. The opening needs to be at least halfway unzipped to create a passage for the bag to be pulled through. You also may have accidentally sewn the lining gap shut. You’ll need to carefully rip out the top seam, open the zipper, and re-sew.
What’s the easiest tote bag pattern for a beginner?
Start with a basic tote bag that has no zipper and simple straps. Master the boxing-the-corners technique first. Our tutorial for a beginner tote bag uses just two main pieces and is perfect for a first project. Once comfortable, add a lining, then tackle the zipper.
Before You Go
A zippered tote is a step up from an open-top bag. The security is worth the extra hour of sewing. The recessed “sandwich” method is the only technique you need for a clean finish.
Remember the three hinges: cut your corner squares for depth, manage the zipper pull mid-stitch, and never, ever sew the lining shut. Get those right, and the bag comes together.
For your next project, try a canvas tote bag for ultimate durability, or a reversible tote bag for two looks in one. The principles are the same.