Learn How to Organize a Tote Bag With a Lasting 3-Zone Method
This post contains affiliate links. As an Amazon Associate, we earn from qualifying purchases.
Organizing a tote bag requires a three-part system: a bag organizer insert for structure, a set of color-coded pouches for categories, and a strict weekly decluttering habit. The goal is ending the daily dig for keys, pens, or lip balm buried at the bottom, which goes beyond neatness.
That structure solves the core problem a tote’s open space creates. Without compartments, everything slides to a single heap. You can’t see what you have, and the bag’s weight distribution pulls on one shoulder. A few simple tools turn that cavern into a series of specific homes.
What follows is the five-minute weekly routine, the specific pouch categories that match real daily loads, and the one mistake that makes any system fail within a month.
Key Takeaways
- Use a tote bag organizer insert to create a false bottom and side pockets, preventing everything from pooling in a mess.
- Assign a brightly-colored pouch to each category (tech, first-aid, daily essentials) so you can grab by sight, not by rummaging.
- Implement a strict 5-minute weekly reset to remove debris, rotate items, and prevent the slow creep of clutter.
- Pack using a three-zone method (bottom for heaviest, middle for daily use, top for quick-access) to balance weight and accessibility.
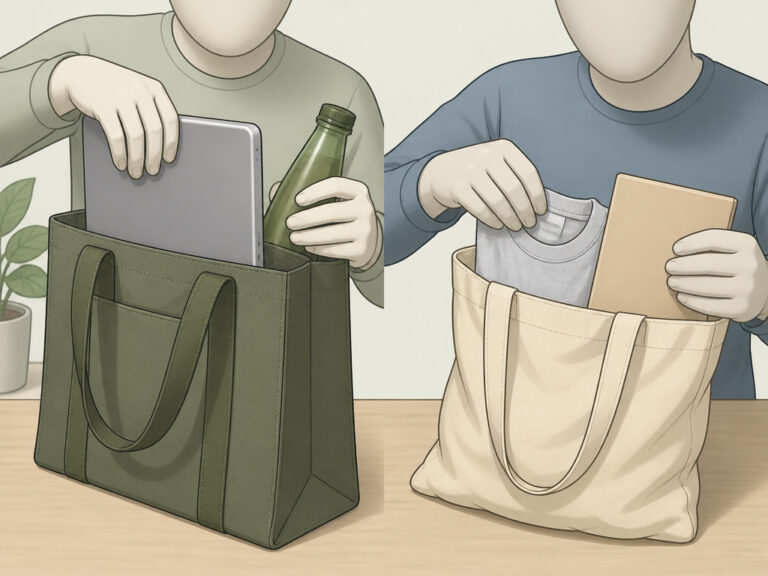
- Never use a tote without a dedicated, padded sleeve for a laptop or tablet, the corners will dig into other items and scratch the screen.
The Core Problem Every Tote Bag Owner Faces
An open tote is a black hole. Receipts, loose change, crumpled tissues, and that one pen that always disappears sink to the bottom and form a layer of debris. The weight of a water bottle or a book pulls the bag into an awkward, sagging shape. You end up carrying a miniature landfill on your shoulder, and finding anything requires a full archaeological dig.
This constant rummaging is destructive, stressing the bag’s seams and lining.Sharp objects like keys or USB drives scratch against each other and against the bag’s interior. For leather totes, like those from HIDES leather, debris and uneven weight can lead to permanent stretching and deformation. The Charles & Keith guide notes that this disorganization directly increases daily stress levels, a physical clutter that creates mental clutter.
Common mistake: Tossing items into the main compartment without containers. A single loose battery can short against keys and drain completely by afternoon; a tube of lip balm will uncap and coat everything in a waxy film.
The fix is a simple mechanical intervention: you need to subdivide the space before you put a single item inside, rather than using a bigger bag or more willpower.
The 3-Zone Tote Bag Method
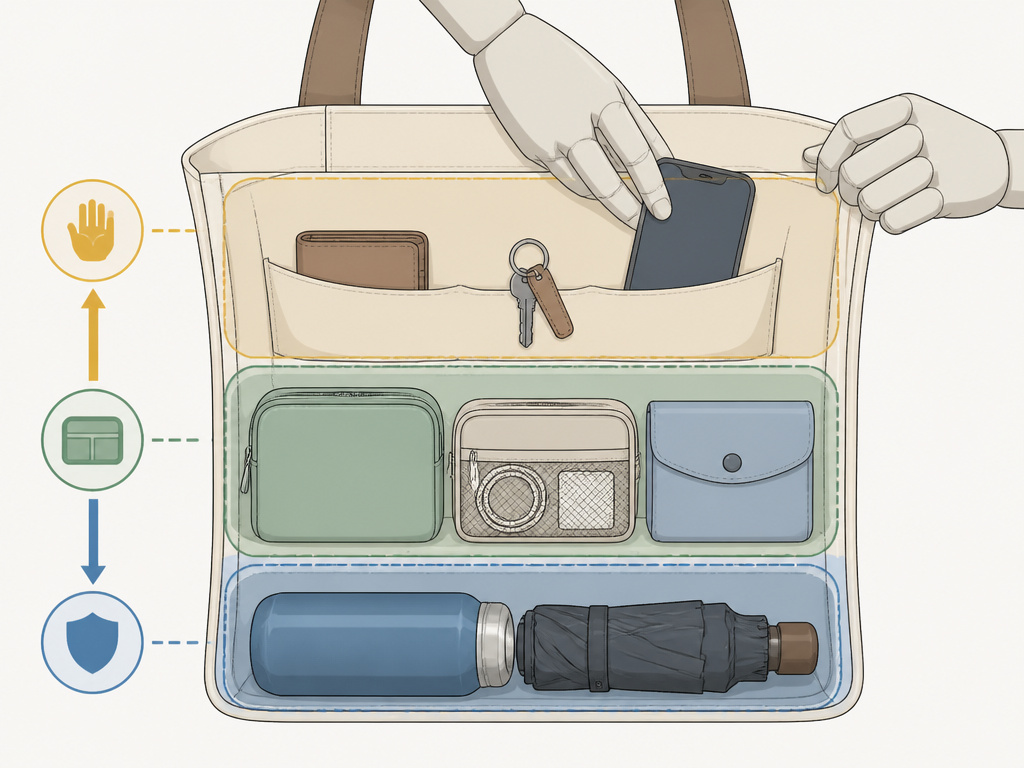
This method works for any tote, from a basic canvas shopper to a structured work bag. It dictates where items live based on their weight and how often you need them, creating natural balance and access.
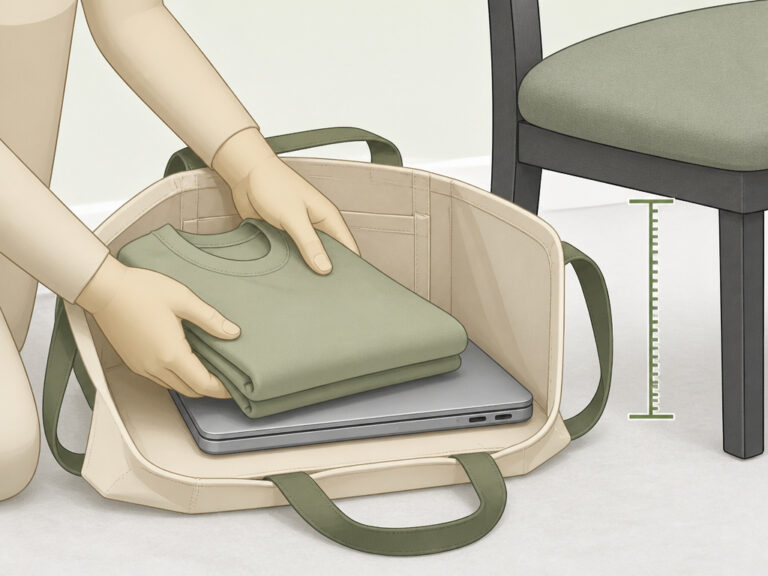
Zone 1: The Foundation (Bottom). This zone is for the heaviest, least frequently needed items. Think a compact umbrella, a packable raincoat, a spare sweater, or a thin notebook. Placing weight low and centered keeps the bag from tipping and makes it more comfortable to carry. If you use a tote bag organizer insert, this zone is the space beneath its structured floor.
Zone 2: The Core (Middle). This is the bulk of your system, housed within your pouches and the organizer’s compartments. Your tech pouch, first-aid kit, snack bag, and makeup case live here. These are the items you’ll need once or twice a day. The middle zone is protected by the foundation below and the quick-access layer above.
Zone 3: The Quick-Access Layer (Top). The very top of your bag’s contents, or the pockets of your organizer, are for items you need instantly. Your phone, wallet, keys, transit pass, and a pen. Some organizers have top-drop pockets perfect for this. The Kipling packing guide emphasizes this “larger items on the bottom” principle for a reason, it prevents the frantic scramble.
| Zone | Purpose | Example Items | If You Get It Wrong |
|---|---|---|---|
| Foundation (Bottom) | Stabilizes weight, supports structure | Water bottle, book, umbrella | Bag sags and pulls on one shoulder; items crush lighter stuff below. |
| Core (Middle) | Holds categorized daily-use kits | Tech pouch, first-aid, snacks | You’re constantly unpacking everything to find one small item. |
| Quick-Access (Top) | Instant retrieval without looking | Phone, keys, wallet, lip balm | You hold up lines digging for your wallet or miss your bus stop. |
This zoning only works if you have the tools to enforce it. A pile of loose items will ignore your best intentions.
The 5 Essential Organizing Tools (And What to Skip)
You need physical dividers. The goal is to transform one big space into many small, dedicated ones. Here are the tools that actually work, drawn from the Reddit “mom friend” thread and brand guides.
-
A Tote Bag Organizer Insert. This is non-negotiable for a floppy tote. It’s a freestanding structure with a rigid bottom and often side panels that you drop into your bag. It creates instant compartments and prevents the dreaded “bottom dump.” Look for one with both open slots and zippered sections. Skip the flimsy fabric ones that collapse under a laptop’s weight.
-
Color-Coded Pouches. As the Charles & Keith guide advises, use brightly colored or clear pouches for different categories. A red pouch for first-aid, a clear one for tech cables, a patterned one for cosmetics. Your hand learns to grab the right color without looking. The Reddit user’s suggestion of using texture differences (smooth vs. Quilted) is also brilliant for blind retrieval.
-
A Dedicated Tech Sleeve. Never put a laptop or tablet directly into your tote, even with an organizer. You need a padded sleeve with a soft interior. The corners of a device are the single biggest cause of scratches on other items and on the bag’s lining. A sleeve like the ones built into a laptop tote bag adds a necessary layer of armor.
-
A Cable Organizer. This is a small roll or case with elastic loops. One USB-C cable, one Lightning cable, a wall plug, and a portable battery go in here. Without it, you get the infamous “cable knot” that takes five minutes to untangle and can damage wire shielding.
-
A Hook or Carabiner. Clip your keys to a small loop inside the bag or to the organizer’s D-ring. This stops the key-search panic. Some people even clip a small pouch for earbuds and lip balm to the bag’s handle for true top-level access.
What most people get wrong: Buying pouches that are all the same color or material. When everything is black nylon, you have to unzip every pouch to find your ibuprofen. Distinctiveness is the whole point.
How to Match Your Pouch Categories to Your Actual Life
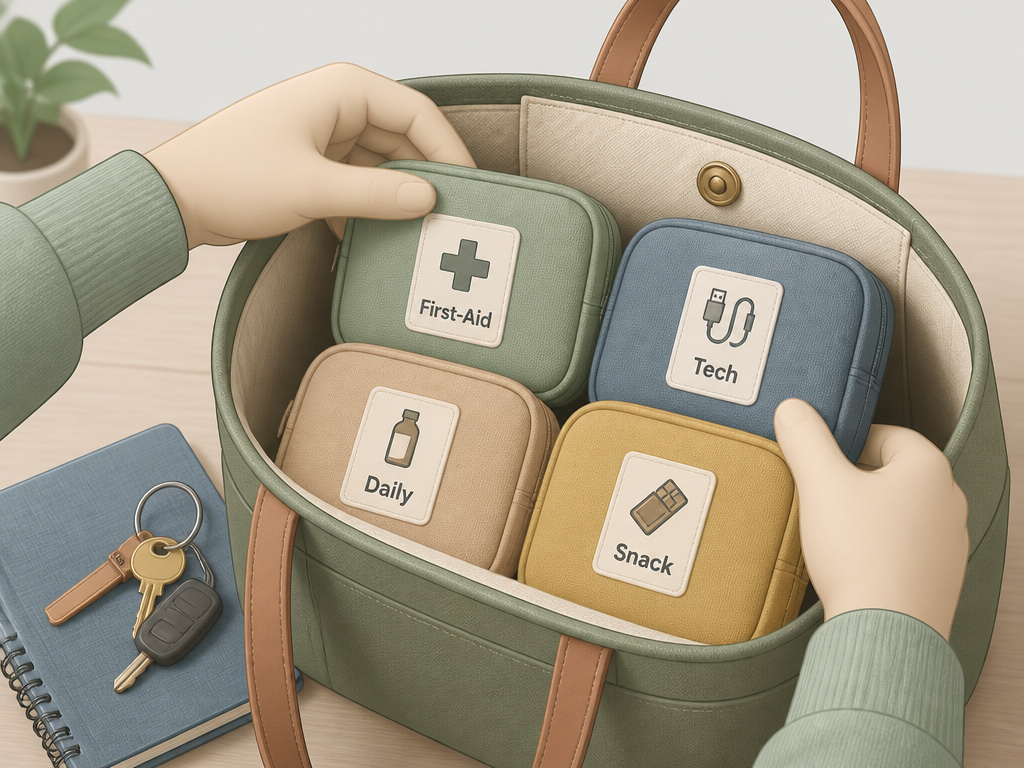
Your categories should reflect what you actually carry, not a generic list. Let’s define them by use-case, pulling from the “mom friend” Reddit example and the Kipling occasion-based packing advice.
- The First-Aid / “Mom Friend” Pouch: Band-aids, individual packets of ibuprofen or antihistamine, tissues, a single-use disinfectant wipe, a safety pin. This pouch is for small emergencies. Keep it sealed and restock any used item during your weekly reset.
- The Tech Pouch: Your cable organizer, a portable battery, earbuds, a USB drive, maybe a portable mouse. This pouch should be padded. Its sole job is to keep hard, scratchy items contained and protected.
- The Daily Essentials Pouch: This is your personal daily kit. Lip balm, hand sanitizer, a compact mirror, a hair tie, a pen, a small notebook. This is the pouch you’ll open most often, so give it a prime spot in your Core zone.
- The Snack Pouch: A granola bar, a bag of nuts, a piece of fruit. Use a small, crush-resistant container or a firm pouch. This prevents a rogue banana from contaminating your entire bag.
- The “Just in Case” Pouch: A foldable tote bag, a pair of disposable gloves, a small flashlight, a reusable straw. This is for the occasional needs. It can live at the very bottom of your Foundation zone.
Not everyone needs all five. A student might combine tech and daily essentials. A professional might add a “meeting essentials” pouch with breath mints and a stain-remover pen. The principle is categorization by function, not by item type.
The Non-Negotiable Weekly Reset
Your system will decay. Receipts will accumulate. Crumbs will find their way in. A pouch will slowly migrate to the wrong zone. This is normal. That’s why you need a weekly reset, a 5-10 minute appointment with your bag.
The HIDES leather guide is adamant about this for bag preservation, especially in humid seasons. Here’s the drill:
- Empty Everything. Turn the bag upside down over a trash can. Shake out the debris. Remove every pouch and item.
- Declutter and Trash. Throw away old receipts, empty wrappers, used tissues. Wipe out the bag’s interior with a dry cloth. If it’s a leather bag, follow the specific how to organize tote bags cleaning guide for your material.
- Audit Your Pouches. Open each one. Restock the first-aid kit. Replace the snack. Untangle the cables. Ask yourself what you used and what you didn’t.
- Repack with Intention. Put the pouches back in their correct zones. Feel the weight distribution. Is the bag balanced?
I tried skipping this reset for two weeks. By day ten, my “organized” bag was just a collection of full pouches in a sea of loose change and grit. The friction of daily use had worn the system down. Now, Sunday evening is bag reset time. It takes four minutes.
Skipping this step is the single point of failure. It’s how a perfect Monday system becomes a Friday disaster.
Special Cases: Work, Travel, and “Mom Life”
The three-zone method bends; it doesn’t break. Adjust your zones and pouch priorities for your day.
For a Work Tote: Your Foundation zone is your laptop (in its sleeve) and maybe a pair of flats. Your Core zone is dominated by a tech pouch, a notebook/planner, and a lunch container. Your Quick-Access layer needs a dedicated spot for your office badge and a professional-looking pen. The choice of bag matters here, a laptop tote bag with built-in padding is worth the investment.
For a Travel Tote (Personal Item): When using a tote as personal item on a flight, Zone 3 (Quick-Access) is everything you need for the security line and in-flight. Your liquids bag, your passport, your boarding pass, headphones. This zone must be at the very top, perhaps in an exterior pocket. The Core zone holds your entertainment (book, tablet) and snack pouch.
For the “Mom Friend” or Parent Tote: Your Foundation zone might have a small change of clothes or a thin toy. Your Core zone expands to hold the first-aid pouch, a snack pouch, and a “kid entertainment” pouch with wipes and small activities. Accessibility is key, you need to grab a band-aid one-handed.
Choosing a Tote That Actually Supports Organization
You can’t organize a bag that fights you. If you’re buying a new tote, let organization be the first requirement, not an afterthought.
Look for these features, in this order: 1. Structured Bottom. A flat, reinforced base prevents sagging and gives your Foundation zone a solid start. 2. Lightweight Lining. A light-colored interior (beige, grey) lets you see what’s inside. A black lining hides everything. 3. At Least One Zippered Pocket. An exterior zippered pocket is a secure Quick-Access zone for a phone or wallet. 4. Strong, Comfortable Handles. The how to carry a tote bag guide will tell you: wide, padded handles distribute weight. Thin straps dig and make you less likely to keep the bag organized. 5. Material Matters. For heavy loads, a tote bag material like coated canvas or reinforced nylon holds its shape better than soft cotton. For a professional look, a structured tote bag fabric like felt or tweed works.
A bag like the Matador Tote Pack 24L or a structured Kipling tote is designed with these features. A floppy beach tote is not. Match the bag to the job, and the organizing job gets 80% easier.
Frequently Asked Questions
What’s the fastest way to organize a tote bag right now?
Grab three pouches or even zip-top bags. Label them “Tech,” “Daily,” and “Other.” Empty your tote, sort everything into those bags, and put them back in. Put your heaviest item (water bottle, book) in first, then the pouches, then your phone/wallet/keys on top. It’s a five-minute emergency fix that proves the system.
Are bag organizer inserts worth it?
Absolutely, if your tote is one big open space. They are the single biggest upgrade for organizing tote bags. They create the compartments your bag lacks. For a structured tote with its own pockets, you might not need one, but for a classic shopper tote, it’s a game-changer.
How do I stop my tote bag from getting so heavy?
Do the weekly reset. This is where you remove the “just in case” items you didn’t use all week. Also, opt for travel-sized containers, a slim wallet, and a lightweight reusable water bottle. The Charles & Keith tip to use compact versions of everything is key. Regular decluttering is weight management.
Can I use this system for a backpack?
Yes. The 3-zone method is universal. Bottom for weight, core for kits, top for quick access. Backpacks often have built-in compartments that align perfectly with these zones, use them as intended.
How do I organize a tote bag for airline travel?
Your priority is the security checkpoint. Pack your liquids bag and electronics at the very top of your Quick-Access zone. Use a tote as personal item that meets your airline’s size rules. Everything you need for the flight (headphones, tablet, snack) should be in your Core zone, easy to reach once you’re seated.
The Bottom Line
Organizing a tote bag is about imposing a simple, repeatable structure on a space designed for chaos, not buying more stuff. Start with a tote bag organizer insert to create compartments.Use colored pouches to sort your life into categories. Pack using the three-zone method to balance the load. Then, defend that system with a five-minute weekly cleaning.
The reward is never fishing for your keys again and finding a band-aid when you need one, which is more than just a neat bag.It’s your shoulder not aching at the end of the day. A little upfront order saves a lot of daily friction.