How to Crochet a Bag: Fix Floppy Messes With Key Techniques
This post contains affiliate links. As an Amazon Associate, we earn from qualifying purchases.
To crochet a bag that holds its shape, you need three things: 100% cotton or a cotton-blend yarn (never acrylic or wool), a hook one size smaller than the yarn label recommends, and a flat oval base built with single crochet. The yarn’s lack of stretch is non-negotiable, acrylic bags sag under a wallet’s weight. A tighter stitch density from a smaller hook prevents gaping, and a wide, flat base is the only thing that stops a tall bag from flopping over.
That last point about the base is where first-time bag makers fail. A base that’s too narrow relative to the bag’s height creates a top-heavy tube that collapses every time you set it down. The fix isn’t more rows; it’s more foundation chains.
What follows is the mechanical breakdown most tutorials skip: why material choice isn’t a preference, how hook size directly fights stretch, and the step-by-step correction for the two most common structural failures (cupping and ruffling). By the end, you’ll be able to diagnose a bad bag from the first three rounds and know exactly which variable to adjust.
Key Takeaways
- Use only 100% cotton or a tight cotton-blend yarn like Lily Sugar’n Cream. Acrylic and wool stretch permanently under load, turning your bag into a saggy sack within a week of use.
- Drop your hook size by 0.5mm from the yarn label’s recommendation. If the label says 5.5mm (I/9), use a 5.0mm (H/8). This tighter gauge creates a stiff, durable fabric that won’t gap.
- A flat oval base is mandatory. If your base curls up like a bowl, your increase stitches are too tight. If it ruffles, they’re too loose. Rip it out and adjust your tension before moving up the sides.
- Line any bag meant to carry weight. A simple fabric liner sewn to the inside top edge distributes stress and prevents stretching at the handles. It’s a one-afternoon upgrade that triples a bag’s lifespan.
- Cotton yarn has no give. Crocheting with high tension can cause hand fatigue or pain within thirty minutes. If your stitches are hard to pull through, switch to the yarn’s recommended hook size for the base, then go back down for the sides.
The #1 Rule for Picking Yarn (That Most Patterns Skip)
This isn’t about color. It’s about polymer chains and memory. The yarn fiber determines whether your bag is a functional container or a decorative pouch that stretches under a set of keys.
Acrylic and wool are thermoplastic and protein-based fibers, respectively. They have elastic recovery, they stretch and then slowly rebound. That’s great for a sweater. It’s a disaster for a bag. The weight of your contents pulls the stitches downward, and the yarn doesn’t spring back. After a few uses, the bag loses its shape permanently. You’re left with a long, sagging mess.
Where this goes sideways: Using acrylic for a market tote. The bag will stretch 3-4 inches in height after one heavy trip to the farmers market, and it will not shrink back.
You need inelasticity. That means plant-based fibers: 100% cotton or a high-percentage cotton blend. Brands like Lily Sugar’n Cream or Paintbox Cotton Aran are standard for a reason. They’re cheap, durable, and they don’t stretch. A cotton-blend yarn like Comfy Cotton Blend adds a tiny bit of give for comfort but maintains enough structure for a bag.
The other option is non-stretchy synthetic cord. Macramé cord, like that used in the B.Hooked simple crochet bag pattern, creates an incredibly stiff fabric. It’s a different feel, but for a structured purse, it’s unbeatable.
| Yarn Type | Best For | Will It Stretch? | Feel & Drape |
|---|---|---|---|
| 100% Cotton (Lily Sugar’n Cream) | Totes, market bags, beach bags | No | Stiff, sturdy, no drape |
| Cotton Blend (Comfy Cotton) | Everyday purses, project bags | Minimal | Softer, slight drape |
| Macramé Cord | Structured purses, baskets | No | Very stiff, rigid |
| Acrylic | Decorative items only | Yes, permanently | Soft, stretches under weight |
| Wool | Decorative items only | Yes, rebounds slowly | Warm, stretches |
The takeaway is blunt: if you want a bag that carries things, start with cotton. Everything else is a compromise that shows up as regret by the second use.
The Hook-Size Contradiction for a Stiff Fabric
Yarn labels suggest a hook size to achieve a balanced, medium-density fabric. For a #4 worsted weight cotton, that’s usually a 5.5mm (I/9) hook. Ignore it.
For bag-making, you want a tight, dense fabric. Loose stitches create gaps that widen under stress and look sloppy. The solution is to use a hook one size smaller than the label says. If the label recommends 5.5mm, start with a 5.0mm (H/8). This increases your stitches per inch, creating a stiffer, more durable material.
Why does this work? A smaller hook produces smaller loops. The yarn has less space to move within the stitch structure, which reduces overall flexibility. It’s the difference between chain-link fencing and chicken wire, the tighter grid holds its shape under pressure.
The part nobody mentions: This tighter gauge makes crocheting harder on your hands, especially with inelastic cotton. If you find yourself straining to pull the hook through after thirty minutes, your tension is too tight for the hook size. Switch to the recommended 5.5mm hook for the foundation chain and first few rounds, then drop back to the 5.0mm for the sides. Your hands will thank you, and the base will still be sturdy.
This rule applies to the bag body. For handles or straps, you might even go down two sizes for maximum rigidity. The goal is a fabric that doesn’t give when you lift it.
How to Build a Flat, Stable Oval Base

The base is the foundation. Get it wrong, and nothing you build on top will fix it. Most bag patterns start with an oval base worked in single crochet because it’s strong and seamless.
A proper oval lies perfectly flat. Two common faults appear immediately: * Cupping: The base curls up like a bowl. Your increase stitches (2 sc or 3 sc in one stitch) are too tight, pulling the work inward. * Ruffling: The base flares and waves like a ruffle. Your increase stitches are too loose, adding too much material.
The fix is in your tension on those increase points. They need to be the same height and density as the regular stitches around them.
Here’s a standard oval base construction for a medium tote. The numbers create the curve.
Foundation: Chain 21. * Round 1: Single crochet (sc) in the second chain from the hook and in each chain across until the last chain. In the last chain, work 3 sc. Now, working along the bottom of the starting chain, sc in each chain across until you reach the starting point. Work 2 sc in the very first chain (where you already have 1 sc). Slip stitch to the first sc to join. (You should have 43 total stitches). * Round 2: Chain 1 (does not count as a stitch). Sc in each stitch until you reach the three center stitches at the rounded end. Work 2 sc in each of those 3 stitches. Sc in each stitch along the straight side, then work 2 sc in each of the 2 stitches at the other rounded end. Sc in the remaining stitches. Slip stitch to join. (You should have 49 total stitches).
Lay your work flat on a table. Does it lie still? Or does it curl or ruffle? Press it down with your hand. If it doesn’t sit flat, rip out Round 2 and rework it, consciously making your increase stitches looser (for cupping) or tighter (for ruffling).
This gauge, 10.5 stitches x 12 rounds = 4 inches in single crochet, is your safeguard. Crochet a 4-inch square swatch with your chosen yarn and hook. If your count is off, your base dimensions will be wrong. A bag that ends up 14 inches wide instead of 16 inches might not fit the liner you cut.
A wide base is critical for stability. A good ratio: for a bag that will be 14 inches tall, the base should be at least 12 inches wide. A tall bag with a narrow base will topple over every time you set it down. If your bag won’t stand up, the base is too small. The only fix is a lining with a stiff interfacing or, next time, chain 25 instead of 21.
Step-by-Step: From Base to Finished Bag

With a flat base, the rest is straightforward repetition. The goal is even, consistent sides that build vertically without leaning.
Step 1: Establish the Sides
After completing your oval base rounds, stop joining with a slip stitch. You’ll now work in a continuous spiral, which avoids a visible seam. Place a stitch marker in the first stitch of the round. Work 1 sc in each stitch around. When you reach the marker, you’ve completed one round. Move the marker up to the first stitch of the new round. Continue.
Working in a spiral can cause the rounds to gradually shift. Every few rounds, work 4 slip stitches in a row to realign your stitches and prevent a diagonal jog. This keeps your edges vertical.
Step 2: Shape the Bag (If Needed)
For a simple tote, just keep crocheting even rounds until the piece measures your desired height. For a shaped purse, you might increase or decrease.
A common technique for structure is the back loop only (BLO) method. By working only into the back loop of each stitch, you create a built-in ridge on the inside that adds rigidity. The Lakeside Cotton Tote pattern uses this with two strands of yarn for a very stiff, textured fabric.
Step 3: Create Handles or Straps
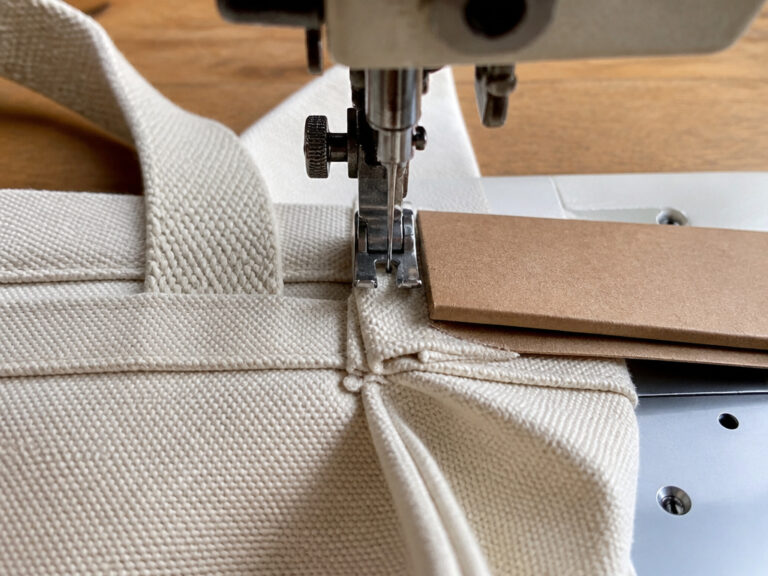
Handles are the point of greatest stress. Reinforce them. * Attached Handles: At the desired handle placement, chain 25-30. Skip the same number of stitches on the bag’s top edge, and slip stitch back into the bag. Then, work several rows of sc around the entire chain and the skipped stitches to create a thick, reinforced strap. This distributes weight. * Detachable Straps: Use purchased bag straps with clips. They are often stronger than crocheted ones. Sew the clip hardware securely to the bag’s sides with strong yarn and a needle, stitching through multiple layers.
For a crossbody bag, you’ll need a longer, adjustable strap. A simple method is to crochet a long chain (e.g., 120 chains) and then work several rows of sc around it for thickness. Attach a slider buckle to make it adjustable.
The Lining & Hardware Upgrade

A lining isn’t just for looks. It functionalizes your bag. It prevents small items from poking through stitches, contains spills, and, most importantly, distributes the weight of the contents so the crochet fabric doesn’t stretch from point loads.
Easy to miss: The lining bears the weight, not the crochet. If you sew the liner only to the top edge, the bag’s body can still stretch. Instead, hand-sew the liner to the crochet fabric at the top edge and along the seam lines of the bag’s corners. This anchors it fully.
How to Add a Simple Liner:
- Turn your bag inside out and place it on folded fabric (so you cut one piece for front and back).
- Trace around it, adding a 1/2-inch seam allowance on all sides.
- Cut out the fabric. Sew the side and bottom seams with right sides together, creating a pouch.
- Drop the fabric pouch inside the crochet bag. Fold the top edge of the fabric under 1/2 inch and pin it to the inside top of the crochet bag.
- Use a needle and thread to hand-sew the lining in place with small, hidden stitches.
For a closure, a magnetic snap is easiest. Sew the snap parts to the lining fabric before you install the liner, reinforcing the area with a small square of interfacing.
Why Your First Bag Might Fail (And How to Fix It)
You’ll know within the first hour if you’re on the wrong path. Here are the common failures and their solutions.
Problem: The bag is already stretching as I crochet the sides.
- Cause: The yarn is acrylic, or your tension is dangerously loose.
- Fix: If it’s acrylic, abandon the project. Start over with cotton. If tension is the issue, go down another hook size.
Problem: The bag is too stiff and my hands hurt.
- Cause: You’re using a very small hook with high tension on inelastic cotton.
- Fix: Switch to the yarn’s recommended hook size for the next few rounds. Stretch your hands. You can tighten up again later.
Problem: The finished bag is floppy and won’t stand up.
- Cause: The base is too small, or the yarn is too soft.
- Fix: For this bag, add a liner with heavy-weight interfacing or even a plastic canvas insert in the bottom. For the next bag, use a stiffer cotton or macramé cord and a wider foundation chain.
Problem: The handles are stretching when I pick up the bag.
- Cause: Handles are under-reinforced.
- Fix: Sew a ribbon or webbing strap to the inside of the crochet handle for invisible support. Or, replace them with purchased leather straps.
Remember, a crochet tote bag pattern is a starting point. Your tension, your yarn substitution, and your commitment to a flat base and a liner are what turn the pattern into a usable object. It’s the same principle behind checking a theme park backpack policy before you go, the rules (or patterns) exist, but your preparation determines the outcome.
Frequently Asked Questions
What is the easiest crochet stitch for a bag?
The single crochet (sc) stitch. It creates the densest, strongest fabric with no gaps. It’s the default stitch for bag bottoms and structured sides. The half-double crochet (hdc) is a bit faster and gives a slightly more flexible fabric, which is okay for the sides of a softer tote.
Can I use any yarn to crochet a bag?
No. You must use yarn with little to no stretch. 100% cotton, cotton blends, or macramé cord are the standard choices. Acrylic and wool will stretch permanently under the weight of your items, ruining the bag’s shape. The B.Hooked pattern explicitly warns against stretchy fibers for this reason.
How do I make my crochet bag bigger or smaller?
To make it bigger, use a thicker yarn (or two strands held together) and a larger hook, which increases your gauge. To make it smaller, use a thinner yarn and a smaller hook. You can also adjust the pattern by adding or omitting increase rounds on the base, or by crocheting fewer rounds for the height.
Do I need to line my crochet bag?
If you plan to carry anything more than a scarf, yes. A fabric liner prevents stretching, gives the bag structure, and keeps small items from falling through stitch gaps. It’s a non-negotiable upgrade for a functional bag. The process is simple hand-sewing, as shown in many a crochet tote bag tutorial.
How do I clean a crochet cotton bag?
Check the yarn label first. Most 100% cotton bags can be hand-washed in cold water with mild detergent. Lay the bag flat on a towel, reshape it, and let it air dry completely. Never wring it out or put it in the dryer, as this can felt the fibers and shrink the bag. For detailed care, our guide on how to clean a canvas tote bag applies similar principles.
Before You Go
Crocheting a bag that works comes down to physics, not just following a pattern. Choose a fightless yarn. Use a hook that makes a tight fabric. Build a wide, flat base. Then line it. Those four steps separate a floppy disappointment from a bag you’ll use for years.
Your first attempt might have a slight lean or a handle that’s too long. That’s fine. The second one will be square, sturdy, and ready for a trip to the market, or even a day out following museum backpack policy on a cultural excursion. The difference is in the specifics you now know to check.