How to Fix a Broken or Stuck Suitcase Handle Yourself
This post contains affiliate links. As an Amazon Associate, we earn from qualifying purchases.
To fix a suitcase handle, first diagnose the exact problem: stuck (clean and lubricate), wobbly (tighten screws), or broken (replace the assembly). Access is through an internal maintenance zipper, using a Phillips screwdriver for most models and dry silicone lubricant, not WD-40, for stuck tubes.
That answer covers the three main failure modes. The real work starts with knowing which one you have, because the wrong fix wastes an hour and can make the problem worse.
What follows is the diagnostic flowchart that separates a five-minute tweak from a full afternoon project, the tool list that actually matches what you’ll find inside, and the manufacturer advice that owners routinely ignore for good reason.
Key Takeaways
- Diagnose first, disassemble second. A stuck handle needs cleaning; a wobbly one needs screw tightening; a broken one needs replacement. Mixing them up costs time.
- Use dry silicone lubricant, not WD-40. Oil-based lubricants attract dust and cause the handle to re-stick within weeks.
- Watch for Torx screws on brands like Samsonite. A standard Phillips head will strip them, turning a simple fix into a parts-order headache.
- Airlines may deny damage claims if the handle is already broken. An attendant’s warning about loose stitching isn’t just advice, it’s a liability shift.
- Replacement handles are model-specific. The length and mounting holes must match exactly, or the new handle won’t fit through the internal channels.
The 3-Step Diagnostic Check (Before You Grab a Tool)
Open your suitcase and try the handle. Don’t just pull it, listen and feel.
A grinding catch points to debris inside the tubes. A side-to-side wobble with no resistance points to loose mounting screws. A complete failure to extend, or a button that depresses with no click, means an internal mechanism has snapped.
Stuck or Jammed: Debris, misalignment, or lack of lubrication on the telescopic poles. Wobbly/Loose: Loose screws or mounting hardware holding the handle assembly. Completely Broken: Bent pole, snapped trigger, or button broken into pieces.
This isn’t just about saving a trip to the repair shop. An airline attendant can flag your bag as “pre-damaged” if the top handle’s stitching is coming undone, which can void liability for further damage during transit. The repair is about more than convenience.
The Tool Kit You Actually Need (It’s Smaller Than You Think)
You don’t need a workshop. For probably 80% of handle fixes, three tools cover it.
A multi-bit Phillips screwdriver is non-negotiable. Most handle assemblies use Phillips #1 or #2 screws. Add a set of Torx bits (star-shaped) if you’re working on a Samsonite or other brand that uses them for the inner tube attachments. A dry silicone lubricant spray beats WD-40 because it doesn’t attract lint. A cloth and an old toothbrush clean the poles. That’s the core kit.
For a full handle replacement, you might need a utility knife to carefully slice open a lining if the maintenance zipper is sewn shut. A pair of needle-nose pliers helps retrieve dropped screws from deep inside the shell.
| Tool | Used For | If You Skip It |
|---|---|---|
| Phillips Screwdriver | Removing mounting bracket screws | Stripped screw heads make disassembly impossible. |
| Dry Silicone Lubricant | Freeing stuck telescopic tubes | WD-40 gums up and the handle re-sticks in 2-3 trips. |
| Torx Bit Set | Samsonite inner tube screws | A Phillips head will cam out and ruin the screw. |
| Needle-Nose Pliers | Gripping small parts, retrieving screws | You’ll spend 20 minutes fishing for a dropped screw. |
| Utility Knife | Accessing a sewn-shut lining | You’ll tear the fabric and create a bigger repair job. |
Keep your workspace clear. Those tiny screws roll away on hard floors, and mixing up the slightly different ones from the top and bottom mounts guarantees a reassembly headache.
The Quick Fix for a Stuck Handle
Most stuck handles aren’t broken. Dirt, sand, and pocket lint jam the telescopic tubes after a few airport runs.
Start with the simplest solution. Lay the suitcase flat and extend the handle as far as it will go. Wipe the exposed metal poles with a damp cloth. Scrub along the seams with an old toothbrush to dislodge packed grit. Dry the poles completely.
Now apply a small amount of dry silicone lubricant directly to the joints. Graphite powder works too. The goal is a thin film, not a soaking.
Press the release button and gently work the handle up and down a dozen times. This works the lubricant into the mechanism. If the handle frees up, cycle it fully five more times to distribute the lubricant evenly. Wipe off any excess.
Common mistake: Soaking the mechanism with WD-40. The oil-based formula attracts dust and lint like a magnet. The handle will slide smoothly for a week, then jam tighter than before because the lubricant has turned into a gritty paste.
If cleaning and dry lubricant don’t free it, the problem is mechanical, not just dirty. You’re moving to the next tier of repair.
Tightening a Wobbly Handle Assembly
 A wobbly handle is almost always a loose screw. The constant rattling of travel vibrates them free over time.
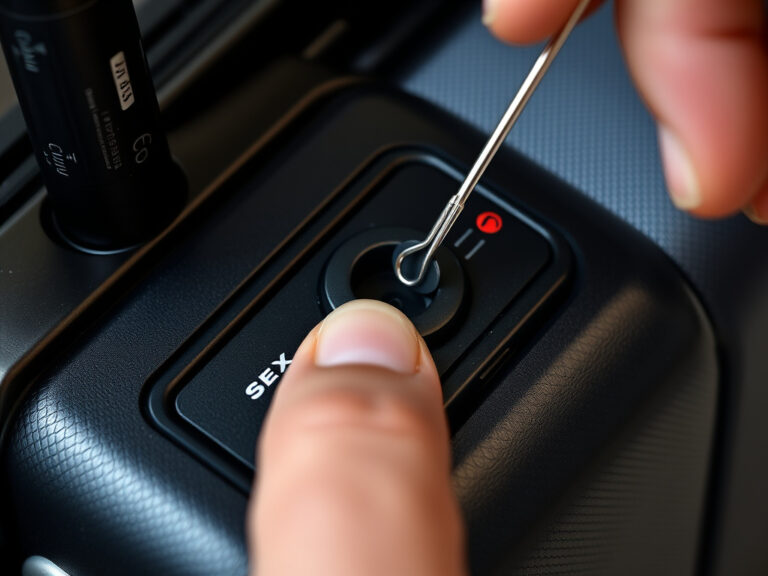
First, find the maintenance zipper. It’s inside the suitcase, usually centered along the back wall where you feel the handle tubes. It often has no pull tab. Use a paperclip or a pair of pliers to gently open it.
This zipper grants access to the handle’s internal mounting brackets. You’ll see two primary mounts: one near the top handle and another near the middle or bottom of the suitcase.
Use your Phillips screwdriver to check every screw on these brackets. Tighten them firmly, but don’t overtorque, you’re threading into plastic or thin metal. Re-tighten any screws on the carry handle bracket too, as it’s often connected.
Test the handle. If the wobble is gone, zip the lining closed. If it persists, the issue might be a worn bushing or a bent tube, which means replacement.
The Full Handle Replacement Walkthrough
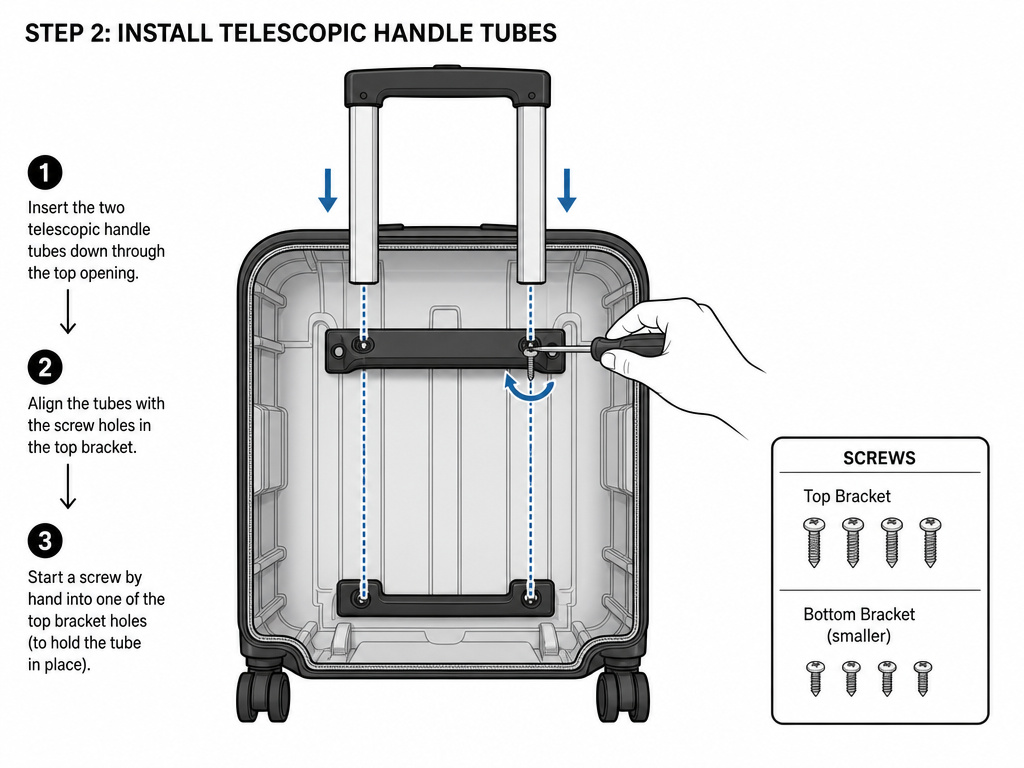 When a pole is bent, the push button is shattered, or the internal locking mechanism fails, you replace the whole telescopic assembly.
First, source the exact replacement. Handles are model-specific. The tube length and the placement of the mounting holes must match perfectly. Search for your suitcase’s model number on a site like Suitcase-Repair to find the right part.
Second, remove the old handle. Open the maintenance zipper. Remove the screws from the top mounting bracket, then the bottom bracket. Organize the screws separately. The bottom ones are sometimes slightly smaller.
Where this goes sideways: Assuming all screws are the same size. Mixing them up during reassembly means the wrong screw won’t seat fully, leaving the handle insecure.
For most suitcases, you can now pull the damaged handle assembly out from the top of the suitcase. For external-handle designs (where the tubes are visible on the back), the handle pulls straight off the outside after the screws are out.
Third, install the new handle. Insert the tubes of the new assembly down through the shell, aligning the screw holes with the brackets. Start the screws by hand to avoid cross-threading, then tighten securely.
Test the new handle thoroughly before closing the lining. Extend it fully, check the middle position if it has one, and collapse it. The button should click positively at each stop.
Special Cases & Professional Warnings
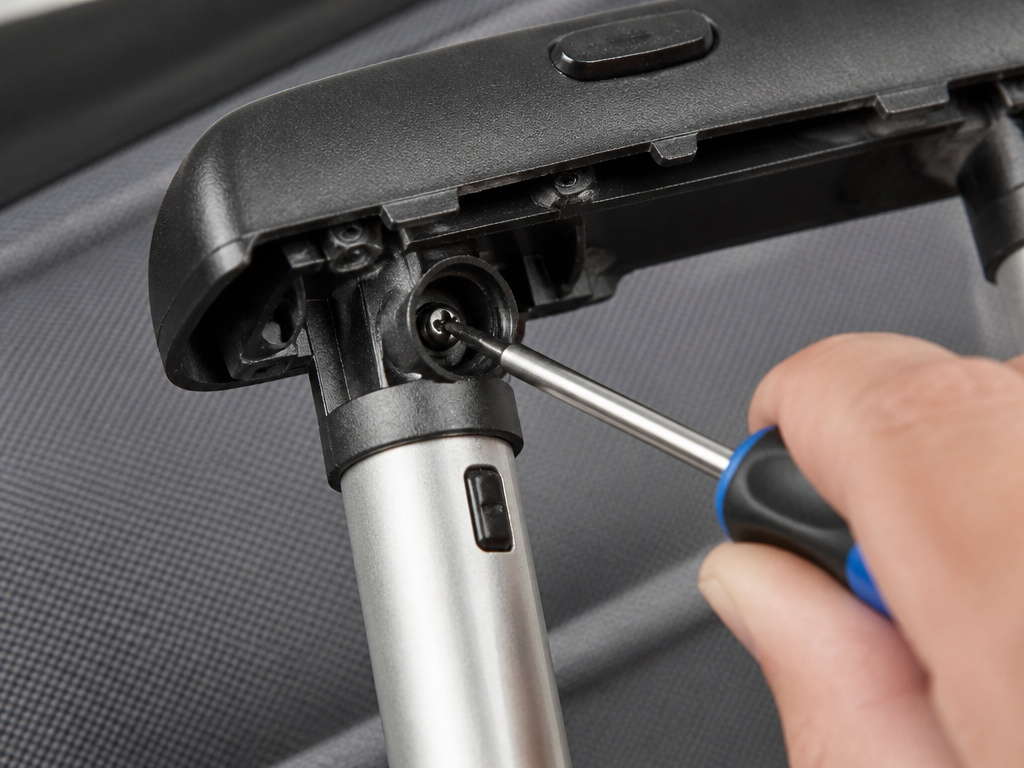 Not every suitcase follows the standard script. Hard-shell models sometimes have the carry handle bracket integrated, forcing you to remove the top handle first. Samsonite models often use Torx screws to secure the inner telescopic tube to the handle grip, a Phillips driver will ruin them.
I worked on a Samsonite where one tube wouldn’t extend. Everyone online said the tube was bent. It was a single loose Torx screw on the inner tube, hidden under the grip. Tightening it took two minutes. The lesson: look for the specific before assuming the general.
Sometimes the maintenance zipper is sewn shut by the manufacturer. If you must cut the lining, use a sharp utility knife and slice along the seam to minimize damage. You can glue it back later with fabric adhesive.
Know when to call a pro. If the suitcase shell itself is cracked around the mounting points, or the internal aluminum frame is bent, a DIY repair won’t hold. The cost of a professional luggage repair service is justified when the alternative is a catastrophic failure mid-trip.
Frequently Asked Questions
Can I use WD-40 to fix a stuck suitcase handle?
No. Manufacturers like Travelpro may suggest it, but repair specialists strongly advise against it. WD-40 is an oil-based lubricant that attracts dust and lint. It will free the handle temporarily, but the mechanism will gum up and re-stick worse than before within a few weeks. Use a dry silicone lubricant or graphite powder instead.
How do I open the hidden zipper inside my suitcase?
Look for a zipper with no pull tab, running along the interior back wall of your suitcase. It’s often right over where the telescopic handle tubes are. Use a paperclip, a small screwdriver, or a pair of pliers to hook the zipper slider and gently pull it open. Never force it, as the teeth can separate.
My handle is wobbly, but all the screws are tight. What now?
If the screws are tight and the wobble persists, the internal bushings or plastic sleeves that guide the tubes are likely worn out. This is a sign the entire handle assembly needs replacement. Continuing to use it risks the tubes bending or the mounting brackets cracking.
Are suitcase handles universal?
No. Telescopic handles are designed for specific suitcase models, with precise tube lengths and mounting hole placements. A handle that is even a centimeter too long or short won’t fit through the internal channels. Always search for a replacement using your suitcase’s exact model number.
Is it worth repairing an old suitcase handle?
It depends on the suitcase’s value and the repair cost. A handle replacement for a quality suitcase like a Travelpro or Briggs & Riley is almost always worth it, as the shell and wheels likely have years of life left. For a cheap, aging suitcase, the cost of the new handle might approach the price of a new bag.
The Bottom Line
Fixing a suitcase handle is a straight-forward mechanical job with a high success rate. Start with the right diagnosis, clean a stuck handle, tighten a wobbly one, replace a broken one. Invest in dry silicone lubricant and the correct screwdriver bits. Sourcing the exact replacement handle is the most critical step.
The skill pays for itself on the first avoided repair bill. More importantly, it turns a travel-day crisis into a minor, solvable problem. You stop seeing a broken handle as baggage and start seeing it as a twenty-minute project.