How to Draw a Suitcase: Master Perspective and Real Specs
This post contains affiliate links. As an Amazon Associate, we earn from qualifying purchases.
To draw a suitcase, start with its real dimensions. A standard carry-on is roughly 55 cm tall, 40 cm wide, and 20 cm deep. Sketch a rectangular box using those proportions, then add the defining hardware: a telescopic handle, two or four spinner wheels, and a TSA lock. The illusion of travel comes from details like corner guards, a luggage tag, and subtle wear marks on the lower third.
That height-width-depth ratio is the carry-on size limit for most airlines, pulled straight from an OEM cabin case manual. Getting the box wrong at the start means every detail you add later will feel off, the handle will be too high, the wheels too small, the whole thing will look like a toy.
What follows breaks the process into two layers. First, the technical foundation: building the correct 3D form from real specs. Second, the storytelling layer: adding the hardware, textures, and travel marks that turn a generic box into a suitcase that looks like it’s been somewhere.
Key Takeaways
- Build your drawing on real suitcase dimensions. A 55x40x20 cm (HxWxD) box is the standard carry-on form.
- The telescopic handle attaches at the exact center-top. Draw the vertical bars first, then cap them with a U-shaped grip.
- Spinner wheels are small, about 5-8 cm in diameter, and set flush with the bottom corners. They are not car tires.
- Add wear logically: scuff marks concentrate on the bottom third, corners, and along the side where it gets kicked in transit.
- Reference real standards like QB/T 1585-1992 for details on stitch length, lock durability, and corner reinforcement.
The 4-Step Foundation for Any Suitcase Drawing
Most tutorials tell you to draw a rectangle. That’s why most suitcase drawings look flat. The first step isn’t a shape; it’s a volume. You are drawing a box that has to hold 38 liters of clothing.
The technical specs from a cabin case manual list dimensions as 55 cm height, 40 cm width, and 20 cm depth including wheels. This 2.75:2:1 ratio is the skeleton of every realistic suitcase sketch.
Start with a vertical rectangle in the center of your page. This is the front face. Its proportion should feel slightly tall and narrow, not square. Now, draw two angled lines from the top-right and bottom-right corners, heading to the right at about a 30-degree angle. These lines represent the depth. Their length should be roughly half the width of your front rectangle, this gives you that 20 cm depth. Connect the ends of these lines with parallel top and bottom lines. You now have a basic 3D box.
Common mistake: Making the side panel too wide. A suitcase is a shallow box. If your side panel looks as wide as the front, your suitcase will resemble a chest. Keep the depth lines short.
The next three steps lock in the structure: 1. Define the top and bottom planes. Lightly draw a horizontal line across the top of your box, connecting the front and back. Do the same at the bottom. This reinforces the idea that it’s a solid object, not just an outline. 2. Round the front corners. Hard-shell cases have rounded corners for impact resistance. Soft-sided ones have reinforced “corner guards.” Lightly curve the four front corners of your box. The curve should be consistent on all four. 3. Establish the ground line. Draw a faint horizontal line underneath your entire box where the wheels will touch. This ensures your suitcase doesn’t look like it’s floating later.
This box is your canvas. Every single detail, handle, wheels, zipper, lock, gets placed in relation to this structure.
Suitcase Anatomy: What Are You Actually Drawing?
You are not drawing a box with a handle. You are drawing a manufactured object with specific, regulated parts. Knowing what they are called and what they do informs how you draw them.
| Part Name | What It Is | Key Drawing Tip |
|---|---|---|
| Telescopic Rod / Handle | The pull-out handle. Made of two or three metal tubes. | Draw the vertical bars first, inset from the edges. The grip is a rounded block that connects them. |
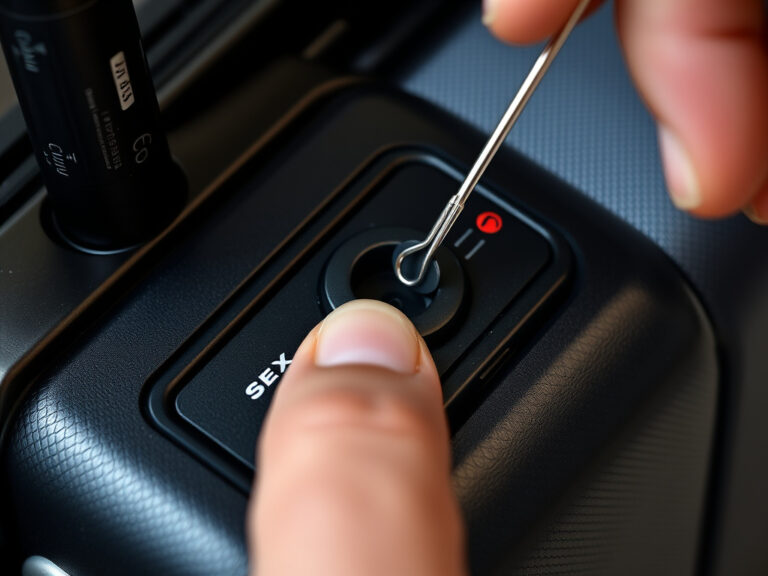
| TSA Lock | A lock with a red diamond logo that airport security can open. | A small rectangular module near the zipper. The diamond logo is a simple red shape. |
| Spinner Wheels | Four 360-degree rotating wheels, usually recessed. | Small circles (5-8 cm). They sit inside a housing that protrudes slightly from the bottom. |
| Corner Guards | Reinforced plastic or metal caps on the corners. | Draw them as slightly thicker, rounded caps over your existing corner curves. |
| Luggage Tag | Hangs from the handle or side handle. | A simple rectangle or oval on a loop. Adds instant narrative. |
These parts aren’t decorations. Their placement follows function. The telescopic handle is dead-center on top for balance. The TSA lock sits just above or below the main zipper pull. The wheels are symmetrically placed at the four bottom corners. If you place a wheel in the middle of the side, the drawing will feel wrong even if a viewer can’t say why.
This functional awareness is what separates a sketch from a technical illustration. When you pack a suitcase efficiently, you use every cubic inch. When you draw one, you show the structure that makes that packing possible.
Adding Realistic Details: Handles, Wheels, and Locks
This is where a suitcase gets its personality. The details are small, but they carry the weight of realism.
The Telescopic Handle
Draw two vertical lines, parallel and close together, descending from the center-top of your suitcase. They should go down about one-sixth of the total height. At the top, connect them with a U-shaped or rectangular bar, this is the grip. Add a slight button or ridge on the grip. The key is to show that this is a separate piece of hardware mounted onto the shell, not just drawn on.
Wheels That Look Like They Roll
For a two-wheel suitcase (rollaboard), draw two half-circles (semicircles) at the bottom two corners on one side. For a four-wheel spinner, draw four small full circles, one at each bottom corner. These circles should be recessed into a slightly larger housing. Add a dot in the center of each circle to suggest an axle, and maybe two or three faint lines radiating out to imply spokes.
Where this goes sideways: Drawing wheels as large, chunky tires. Suitcase wheels are small and discreet. Oversized wheels make your drawing look like a child’s pull-toy.
Locks, Zippers, and Seams
The lock is a small rectangle. Place it near a zipper line. The zipper itself is often a double line that runs around three sides of the case. Don’t draw every tooth; suggest it with a dashed line or a single line with a pull-tab. Seams are where the shell panels join. Draw them as simple, straight lines following the edges of your form.
These details should feel integrated, not pasted on. The handle emerges from the shell. The wheels are part of the bottom structure. This integration is why understanding the initial 3D box is non-negotiable.
Perspective and Shadow: Making It Pop Off the Page
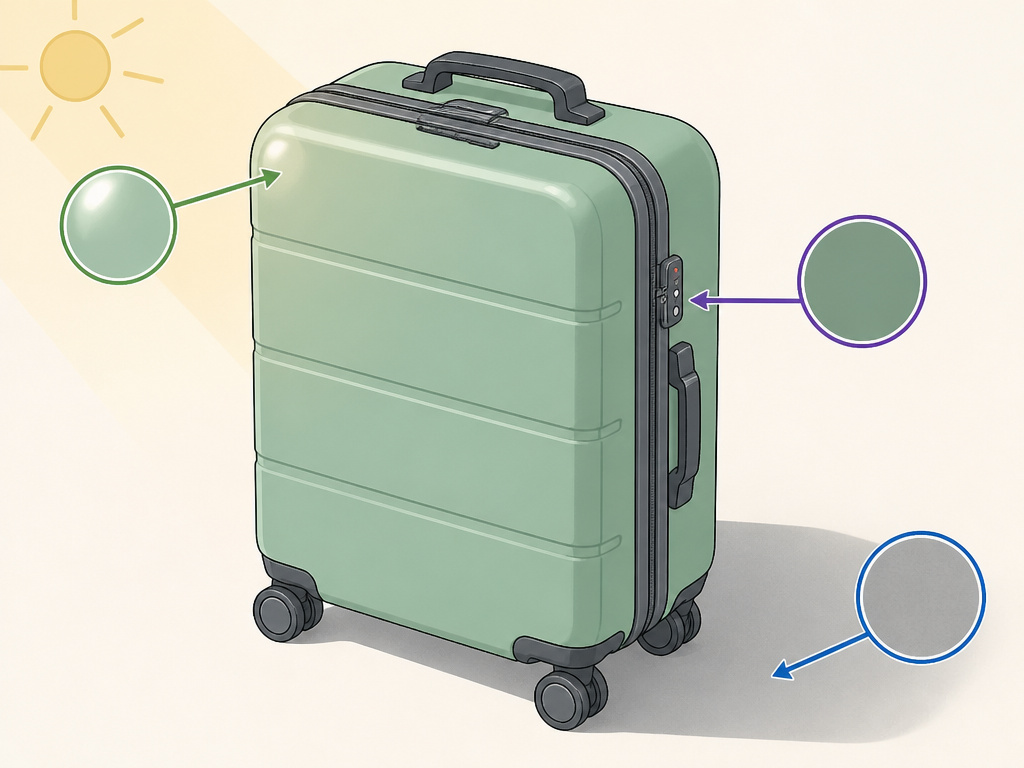
A flat line drawing is a blueprint. Light and shadow turn it into an object. Your light source decides everything. Pick one: upper left is standard.
Cast Shadows
The suitcase casts a shadow on the ground. This shadow is a slightly elongated, softer version of the suitcase’s own shape, stretching away from the light source. If your light is top-left, the shadow extends down and to the right.Keep it light and diffuse.
Form Shadows
These are the shadows on the suitcase itself. The side panel facing away from the light (the right side, if light is top-left) will be darker. The underside of the handle grip, the recess around the wheels, and the space under corner guards will have small, sharp shadows.
Highlight
The front-top-left corner will catch the most light. Leave a tiny strip of your paper white there, or shade very lightly around it. This highlight is what sells the hard, glossy surface of a polycarbonate shell.
| Surface Type | Shadow Character | Highlight |
|---|---|---|
| Hard Polycarbonate | Sharp, clear edges. High contrast. | Small, bright, and specular. |
| Soft Nylon/Fabric | Soft, blended edges. Lower contrast. | Broad, diffused, and gentle. |
| Metal (Handle, Lock) | Very sharp, dark shadows. | Very small, brilliant white spot. |
Shading defines planes. The side panel is one plane, the front is another.Where they meet at a rounded corner, the shadow transitions smoothly.
Style and Story: From Technical Sketch to Travel Companion
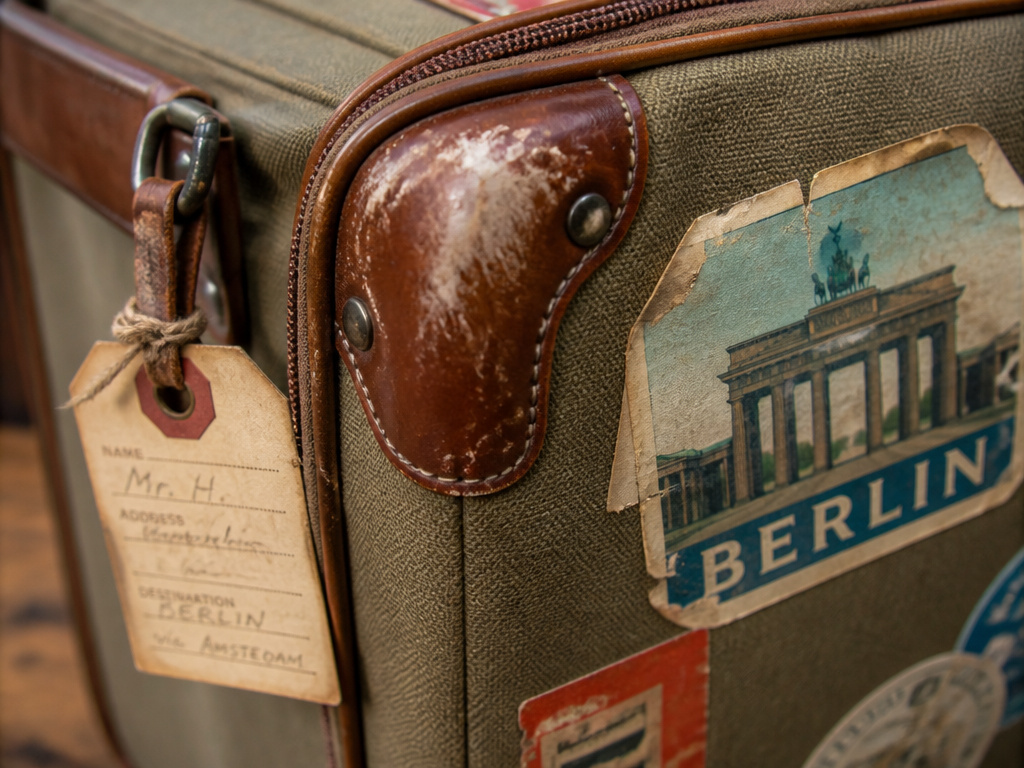
Now you have a correct, shaded suitcase. The final layer is narrative. Why is this suitcase interesting?
Add Travel Stickers or Scuffs
A single, tilted rectangle on the front with a fake airline logo or a destination name (“BERLIN”) adds backstory. Scuff marks are not random. They cluster on the bottom third, on the corners that hit curb edges, and along the side that faces out when you’re pulling it. Use your eraser to lightly lift out some graphite in these areas to create scuffs, or add quick, rough pencil marks.
The Luggage Tag
A tag dangling from the handle is a classic trope for a reason. It’s a simple shape that implies ownership and journey. Draw a small rectangle or oval, attach it with a loop to the handle, and maybe add a few scribbled lines for writing.
I won’t recommend drawing a fully loaded, overstuffed suitcase bulging at the seams for your first attempt. That’s an advanced problem in fabric tension and deformation. Get the empty form right first.
Your style choice here is decisive. A clean, hard-shell suitcase with a single sticker speaks to modern, efficient travel. A soft-sided case with leather corner guards, buckled straps, and lots of scuffs tells a story of vintage adventure. Choose your details to match the tale you want the drawing to tell. This is the same logic you use when you choose a backpack as a personal item, the object’s wear and features hint at its use.
Frequently Asked Questions
What is the easiest way to draw a suitcase in 3D?
Draw a vertical rectangle. From its right side, draw a parallel, shorter rectangle to represent the side panel. Connect the corners. This creates a basic box. Round the front corners slightly, and you have the core 3D form. All details attach to this box.
How do you draw a suitcase handle so it looks real?
Draw two short, parallel vertical lines coming out from the top center of the case. Cap them with a horizontal bar or U-shape for the grip. Add a slight shadow underneath the grip and where the vertical bars meet the suitcase shell. This shows it’s a separate, attached object.
Where should the wheels go on a suitcase drawing?
For a two-wheel roller, place two semi-circles at the bottom two corners on one side. For a four-wheel spinner, place a small circle at each of the four bottom corners. The wheels should be small relative to the case size, no bigger than 1/10th of the suitcase’s height.
How can I make my suitcase drawing look less flat?
Shading is the answer. Choose a light source (e.g., top left). Darken the side panel opposite the light (the right side). Add a soft cast shadow on the ground extending from the suitcase. Leave a thin highlight on the front-top-left edge. This defines its three-dimensional form.
The Bottom Line
Drawing a suitcase well means respecting its real-world design. Start with the standard carry-on dimensions, a 55x40x20 cm box. Build your sketch from that accurate 3D form. Add the hardware where it actually goes: a centered telescopic handle, small recessed wheels, and a TSA lock near the zipper.
The realism is in the specs. The Chinese national standard QB/T 1585-1992 dictates everything from stitch length to lock durability. While you don’t need to count stitches, knowing these details exist informs the precision of your lines. The story is in the wear. Scuffs on the bottom, a tilted travel sticker, a dangling tag, these turn a technical drawing into a piece of travelogue.
Grab a pencil and build the box first. The rest is just details you’ve seen a thousand times at the airport, now waiting for your line.