DIY Tote Bag from a Feed Bag: Step-by-Step Making Tutorial
This post contains affiliate links. As an Amazon Associate, we earn from qualifying purchases.
To make a tote bag from a feed bag, you need a woven polypropylene sack, a heavy-duty sewing machine with denim needles, strong thread, and clips instead of pins. The process involves thoroughly cleaning the sack, cutting it to a straight rectangle, constructing durable straps, sewing reinforced seams, and creating a flat bottom by boxing the corners.
Most tutorials skip the material science. They tell you to use any feed sack. A paper chicken-feed sack or a thin plastic liner will split at the side seams within two weeks of carrying groceries. The bag looks cute until it fails.
This guide walks through selecting the right sack, setting up your machine to handle thick plastic weave, and building a tote that lasts years. We’ll cover the tools that prevent frustration and the reinforcements that prevent failure.
Key Takeaways
- Use only woven polypropylene feed sacks. Paper and thin plastic sacks tear at the seams under load.
- Replace pins with clips. Pins perforate the plastic weave, creating weak points that split later.
- Set your sewing machine to a wide stitch (3.5–4mm) and use denim needles (size 100/110). A tight stitch acts like perforation and rips the material.
- Double or triple stitch all seams, especially the bottom and strap attachments. A single seam on polypropylene pulls apart from stress fatigue.
- Nylon webbing straps are more comfortable and durable than folded feed sack straps, but making straps from the sack itself is a true upcycle.
The One Material Mistake That Ruins Feed Bag Totes
Head design changes the entire process. Look at the business end of your trimmer.
Not all feed sacks are equal. The printed burlap look is often a plastic weave. Woven polypropylene is the target material. It’s waterproof, tear-resistant, and has enough flexibility to sew. Paper sacks, like some chicken feed brands use, are a dead end. Thin plastic liner bags, common in some bulk products, crumple and puncture.
Feed sacks made from woven polypropylene have a tensile strength around 40–50 MPa and a melting point above 160°C, which allows them to withstand sewing friction and daily abrasion. Paper sacks have a tensile strength under 5 MPa and will split along stitch lines within 10–15 load cycles.
Identify it by touch and sound. Polypropylene feels slightly slick, rustles with a plastic whisper, and doesn’t stretch much. Paper is soft, absorbs water instantly, and tears with a dry crack. If you hose it down and the water beads up, it’s polypropylene. If it darkens and gets soggy, it’s paper.
TL;DR: Use only woven polypropylene feed sacks. Paper and thin plastic sacks fail quickly.
Cleaning: The Step Everyone Rushes
Wind direction decides whether the head feeds or jams.
Hosing the sack outside is the first move. Do this on a driveway or patio. Turn the sack inside out and blast the interior. Feed dust is fine and clingy. It sticks to the weave and smells like grain silage for months if you skip this. Use a brush with stiff plastic bristles to scrub the inside after rinsing. A kitchen brush works.
Let it dry completely. Hang it over a fence or lay it on a sunny concrete slab. Polypropylene dries fast, but the seams and glued edges hold moisture. Wait until the bag feels cool and dry, not just surface-dry. That takes about two hours in direct sun.
Common mistake: Skipping the inside scrub — the residual feed dust mixes with moisture from carried items, creating a sour mildew smell inside the bag within a month.
If your sack has a stubborn odor, a vinegar wipe can help. Mix white vinegar and water 1:1, wipe the interior, and let it dry again. Don’t soak it. Polypropylene won’t absorb vinegar, but the acid neutralizes organic residues.
TL;DR: Hose, scrub inside, dry completely. Residual dust causes mildew smells.
Tool Setup: What Your Sewing Machine Actually Needs
A standard home sewing machine can handle this, but it needs adjustments. The material is thick and slick. A Singer Heavy Duty model or any machine with a higher torque motor is ideal. The first time I ran a polypropylene sack through a lightweight machine, the needle jammed, skipped stitches, and the motor groaned. I switched to a borrowed Singer Heavy Duty and the difference was immediate.
Needle choice is critical. Use denim needles (size 100/110) or leather needles. These have a sharp, tapered point that pierces the weave without deflecting. A universal needle will bend, cause skipped stitches, and possibly break.
Thread matters. Gutermann Mara 100 or any strong, polyester-based thread is necessary. Cotton thread wears against the plastic and frays. The seam then weakens from abrasion, not load.
| Tool | Specification | Risk If Wrong |
|---|---|---|
| Sewing Machine | Heavy-duty motor, adjustable speed | Lightweight motor stalls, skips stitches on thick seams |
| Needle | Denim/Leather, size 100/110 | Universal needle bends, breaks, causes uneven stitching |
| Thread | Strong polyester (Gutermann Mara 100) | Cotton thread frays, seam fails from abrasion within months |
| Pins vs. Clips | Clips only | Pins perforate plastic, creating split points along stitch lines |
Set your stitch length to wide. A 3.5–4mm setting is right. A tight stitch (2mm) acts like perforation on this material. The line of stitches becomes a tear line. Adjust your tension slightly higher than for cotton. The plastic doesn’t compress, so the thread needs to lock tightly.
TL;DR: Use a heavy-duty machine, denim needles, strong polyester thread, and a wide stitch.
The 7-Step Assembly That Builds a Bag That Lasts
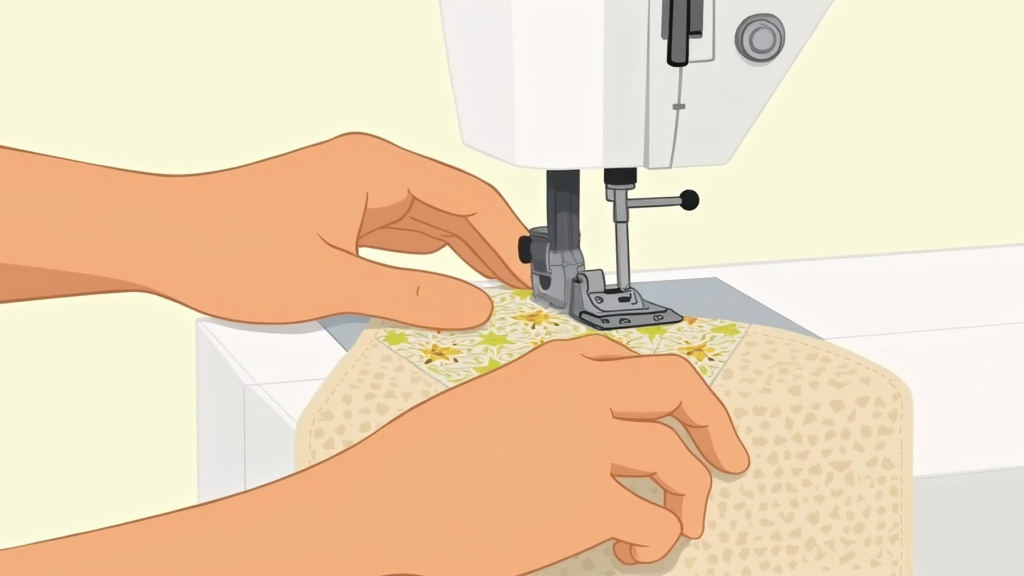
This sequence assumes you have a cleaned, dry woven polypropylene sack.
- Cut the sack to a straight rectangle. Cut off the top and bottom sealed edges. Remove any leftover tie strings. Use a ruler aligned with the printed text on the sack to draw a straight cutting line for the bottom. This ensures the bag sits flat later. If you cut wavy, the bottom seam twists.
- Decide on strap material. For nylon webbing, cut two lengths of 1-inch wide webbing to 24–28 inches. For DIY straps from the sack, cut two 3-inch wide strips from areas with plain design. Fold each strip into a 1-inch wide strap, crease firmly, and sew a 1/8-inch seam down each long edge. Skip this creasing, and the strap bunches inside the machine.
- Create the top hem. Turn the sack inside out. Fold the top edge down 1 inch, then fold again another 1 inch. This double-fold hem hides the raw edge and creates a channel for strap attachment. Crease well and clip the fold in place. Pins would puncture here.
- Mark strap placement. On the hem, measure 6 inches from each side seam and mark a small dot. This balances the load. Placing straps too close to the sides makes the bag tilt when carried.
- Attach straps with reinforcement. For webbing, insert the end between the hem layers at your mark. For DIY straps, tuck the raw end inside. Sew a reinforced rectangle about 2 inches long over the strap end. Then stitch an X inside the rectangle. This distributes pulling force. A single straight stitch here pulls out after about 20 heavy loads.
- Sew the side and bottom seams. With the bag still inside out, sew the side seams 1/4 inch from the edge. Then sew the bottom seam. Double stitch these seams by running the machine over them again. Triple stitching is better for a bag meant for tools or produce.
- Box the corners for a flat bottom. Pinch a bottom corner flat, aligning the side seam with the bottom seam. Measure 2.5 inches from the point for a standard tote, or 4 inches for a wider bag. Sew across this measurement. Cut off the excess triangle. Repeat on the other corner. This creates the flat base that lets the bag stand.
I tried boxing corners at 3 inches on a first bag. The bottom was too shallow and the bag wobbled when set down. Now I use 2.5 inches for grocery totes and 4 inches for garden harvest bags. That extra half-inch changes stability.
Follow these steps in order. Skipping the hem before side seams means you sew the hem with the bag right-side-out, which looks messy. Attaching straps after boxing corners is awkward because the bag is already three-dimensional.
TL;DR: Cut straight, make straps, hem top, attach straps with X reinforcement, sew double-stitched seams, box corners at 2.5 or 4 inches.
Straps: Comfort vs. DIY Grit
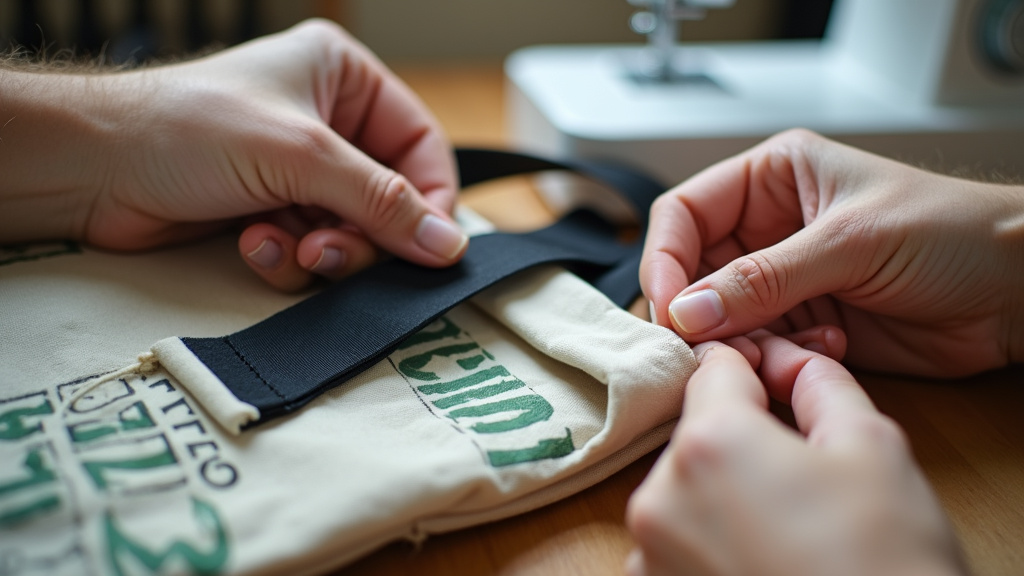
Nylon webbing is the comfort winner. It’s smooth, doesn’t dig into your shoulder, and its strength is proven. You can buy it in 1-inch width, cut to length, and attach it. No folding, no creasing. It also doesn’t stretch over time.
Making straps from the feed sack itself is the true upcycle move. It uses every part of the bag. But they are less comfortable. The folded plastic edge can feel sharp on bare shoulders. They also require precise folding and sewing.
| Strap Type | Pros | Cons | Best For |
|---|---|---|---|
| Nylon Webbing | Comfortable, no stretch, easy attachment | Not upcycled, adds cost | Daily use, grocery carrying |
| Folded Feed Sack | True upcycle, uses all material, unique look | Less comfortable, requires skill, can stretch | Display, light loads, craft fairs |
| Alternative: Seatbelt | Extremely strong, wide, recycled | Heavy, stiff, hard to sew | Tool bags, heavy cargo |
If you choose DIY straps, cut the 3-inch strips from areas without heavy graphics. The printed ink can crack along the fold line after repeated bending. Use a hot iron on low heat to crease the folds. Place a towel between the iron and the plastic to prevent melting.
Attach them with the reinforced rectangle and X method. A straight stitch will pull out because the plastic flexes at the attachment point. The X spreads the stress across four directions.
TL;DR: Nylon webbing for comfort; folded sack straps for full upcycle; seatbelts for extreme strength.
Reinforcements: Where the Bag Actually Fails
The side seams and bottom seam are the first failure points. A single stitch line on polypropylene suffers from stress fatigue. The thread cuts into the plastic under load, slowly widening the hole. Double stitching adds a parallel line that shares the load. Triple stitching is overkill for light use but right for a bag carrying tools.
The strap attachments are the second failure point. The pulling force is concentrated. The reinforced rectangle and X pattern turns a point load into a distributed load. Without it, the strap tears out from the hem, often ripping the hem material too.
Common mistake: Single stitching the bottom seam — after about 30 uses carrying 10+ pounds, the seam threads visibly stretch and the plastic around them starts to whiten and crack.
Adding a fabric lining isn’t just for looks. A lining protects the contents from any residual dust and adds internal structure. Use a sturdy cotton or canvas. Sew it as a separate bag inside, then attach it at the hem. This also hides the raw seams of the feed sack.
TL;DR: Double stitch all seams. Reinforce strap attachments with a rectangle and X. Add a lining for structure and cleanliness.
Customization: Making It Your Own
Adding a pocket is straightforward. Cut a rectangle from leftover sack material or contrasting fabric. Clip it to the inside or outside before sewing the side seams. Sew around three sides, leaving the top open. An interior pocket is useful for keys or a phone.
A zipper closure transforms the bag into a secure tote. This requires more sewing skill. Install the zipper in the top hem before attaching straps. Use a nylon coil zipper, as metal teeth can scratch the plastic. Our zipper installation guide details the process for thick materials.
Painting or decorating the sack is possible with the right paint. Use acrylic paint designed for fabric or plastic. It must be flexible after drying. Test a small area first. Decorative techniques like stitching patterns or adding patches follow general tote bag personalization principles.
For a reversible design, you’d need to construct a second bag from fabric and attach them at the hem. This is more complex, but our reversible bag tutorial covers the method.
TL;DR: Add pockets, zippers, or paint. Each upgrade follows standard bag-making techniques adapted for thick plastic material.
Frequently Asked Questions
Can I use any feed bag for this project?
No. You must use a woven polypropylene feed sack. Paper sacks and thin plastic liner bags will tear under load. Identify polypropylene by its slick feel, water resistance, and plastic rustle sound.
Do I need a special sewing machine?
heavy-duty sewing machine is recommended. Lightweight machines may stall or skip stitches on the thick material. Use denim needles (size 100/110) and set a wide stitch length (3.5–4mm).
Why can’t I use pins?
Pins perforate the plastic weave, creating small holes that weaken the material along stitch lines. These holes can expand into splits over time. Use clips or binder clips to hold pieces together.
How do I make the straps comfortable?
Nylon webbing straps are the most comfortable option. If you make straps from the feed sack, fold them precisely and consider padding the inner edge with a strip of soft fabric before sewing.
How long does a feed bag tote last?
well-made tote from woven polypropylene, with double-stitched seams and reinforced strap attachments, can last for years of regular use. Poor construction or wrong material leads to failure within weeks.
Before You Go
Making a tote bag from a feed bag is a practical upcycle project. The durability hinges on material choice and construction details. Select a woven polypropylene sack, clean it thoroughly, and equip your sewing machine with heavy-duty needles and strong thread.
Double stitch every seam. Reinforce strap attachments with more than a single line. Consider nylon webbing for comfort or embrace the full upcycle with folded sack straps.
This bag won’t look like store-bought linen. It will look like a feed sack turned into a tool. That’s the point. It’s durable, waterproof, and carries the history of its first life into its second. For more on constructing durable bags from scratch, see our durable canvas tote guide. Understanding common bag materials helps in selecting fabrics for linings or complementary projects.