How to Make a Duffle Bag: The 7-Step Build That Lasts
This post contains affiliate links. As an Amazon Associate, we earn from qualifying purchases.
To make a duffle bag, you need three things: a heavy-duty fabric like canvas or duck cloth, a structural interfacing like fusible fleece, and a #10 coil zipper at least 20 inches long. The build follows a simple panel-and-gusset construction, but the durability lives in the seam allowances, the strap reinforcement, and the order you attach the zipper.
Most homemade bags fail at the handles. They sew a single line of stitching through the webbing and the exterior fabric, then wonder why the strap rips off after two gym trips. The fabric tears, not the thread. The fix isn’t more thread. It’s spreading the load.
This guide walks through the seven non-negotiable steps for a bag that won’t quit, from picking fabric that can take a beating to the specific box-and-X stitch pattern that holds 50 pounds of gear. We’ll cover the common mistakes that turn a weekend project into a frustrating pile of scraps and the one tool that makes sewing thick layers actually possible.
Key Takeaways
- Pre-wash all fabric, especially cotton canvas, or the finished bag will shrink and warp after its first laundry cycle. Dry it twice if you have to.
- Use a walking foot on your sewing machine. Trying to sew multiple layers of canvas and fleece with a standard foot will cause uneven feeding, skipped stitches, and a lot of swearing.
- Reinforce strap attachment points with a box stitch and an X inside it. A single line of straight stitching will pull through the fabric under load.
- Leave the main zipper at least one-third open when sewing the final end seams. If you sew it shut, you cannot turn the bag right side out.
- For a professional finish, topstitch 1/8 inch from every major seam, especially around the zipper. This flattens the seams and adds a visual line that hides minor wobbles.
The 4 Tools That Replace a $200 Service Visit
You can sew a bag with a basic machine. Making one that survives being checked at the airport requires a couple of specific upgrades. These aren’t just nice-to-haves. They’re the difference between a bag that lasts a season and one that becomes your go-to for a decade.
A walking foot is the first non-negotiable. A standard presser foot relies on feed dogs pulling the bottom layer of fabric. The top layer is pushed by the foot, often causing it to stretch or shift. With canvas, fleece, and webbing, that shift becomes a permanent puckered seam. A walking foot has its own set of feed dogs on top, synchronizing the movement of all layers. It’s the only way to get even stitching over eight layers of fabric at the strap anchors.
A standard home sewing machine needle will snap on the third pass through webbing and canvas. Use a size 100/16 Heavy Duty or Denim needle. The sharper point and stronger shaft punch through without deflecting, which prevents skipped stitches and broken threads mid-seam.
The second is a zipper foot. This narrow foot lets you stitch close to the zipper teeth. Trying to install a heavy-duty zipper with a standard foot means your needle hits the plastic coil and either breaks or pushes the fabric out of alignment. The third is a rotary cutter, mat, and acrylic ruler. Cutting canvas with scissors is possible but inaccurate. Your seams will be off by an eighth of an inch, and that error multiplies when you box the corners. A rotary system gives you dead-straight lines.
The fourth is an iron and a pressing ham or a tailor’s clapper. Every seam must be pressed open or to one side before topstitching. Pressing sets the stitches into the fabric and flattens bulk. A clapper held down on a hot seam works like a vise, cooling the fabric into a crisp, flat edge.
TL;DR: A walking foot, heavy-duty needle, zipper foot, and rotary cutter aren’t optional for durable bags. They prevent the fabric shifting, needle breaks, and inaccurate cuts that ruin a project.
Fabric and Hardware: What Actually Holds Up
The fabric choice dictates everything. Quilting cotton is for tote bags. For a duffle, you need a fabric with a high denier count and a tight weave. Canvas or duck cloth (10 to 15 oz weight) is the standard for a reason. It’s stiff, abrasion-resistant, and takes interfacing well. Cordura nylon is tougher but requires a Teflon or roller foot to sew. Waxed canvas looks great but can gum up your needle.
The lining is for slide, not structure. Use a lightweight nylon taffeta or a smooth cotton sateen. Avoid flannel or fleece linings. They add bulk and catch on every zipper pull and pair of sunglasses.
Interfacing is the skeleton. Fusible fleece adds soft structure and body. For a truly rigid bag, use a sew-in stabilizer like Pellon Peltex 71. It’s a stiff board you’ll hate sewing through, but the bag will hold its shape empty. I fuse fleece to the exterior pieces and often add a second layer of a mid-weight woven interfacing to the strap attachment areas.
| Component | Recommended Material | Why It Works | What Happens If You Skip It |
|---|---|---|---|
| Exterior Fabric | 10-15 oz Cotton Canvas or Duck Cloth | Tight weave, high abrasion resistance, accepts fusible interfacing well. | Bag sags, exterior scuffs and tears quickly, seams distort under load. |
| Interfacing | Pellon Fusible Fleece (987F) or Peltex 71 | Adds body, eliminates flop, provides a stable base for stitching. | Bag feels flimsy, won’t hold its shape, topstitching looks wobbly on loose fabric. |
| Zipper | YKK #10 Coil Zipper, 22″ length | #10 coil is self-repairing, nylon teeth flex. YKK sliders are durable brass. | Lightweight zipper snags and separates under the stress of an overstuffed bag. |
| Strap Webbing | 1″ Wide Polypropylene Webbing | Doesn’t stretch, UV resistant, holds a bar tack stitch without fraying. | Nylon webbing stretches over time, causing the bag to droop; cotton webbing frays. |
The zipper is a critical point of failure. A dress zipper will pop. You need a #5 or #10 coil zipper from YKK. The #10 is thicker and more durable for a large bag. Get a separating zipper that opens fully. The length should be the width of your bag plus 2 inches. For a 20-inch wide bag, use a 22-inch zipper.
Straps need polypropylene webbing, not nylon or cotton. Polypropylene doesn’t stretch. Cut two 8-inch pieces for the handles and one 60-inch piece for the shoulder strap. For hardware, use 1-inch D-rings and a swivel hook. The swivel prevents the strap from twisting.
Common mistake: Using a lightweight interfacing on canvas — the fleece bonds weakly to the thick fabric and bubbles away after the first wash. The bag loses all structure. Always use a heavy-duty fusible like 987F, and press with a steam iron for a full 12 seconds per section.
The 7-Step Duffle Bag Assembly (and the One Step Nobody Skips)
The process isn’t complex, but the sequence is absolute. Deviate, and you’ll be seam-ripping for an hour.
Step 1: Pre-wash, Press, and Cut Everything
Pre-wash your exterior fabric and lining with the detergent you’ll use later. Dry it completely. Canvas shrinks. If you skip this, the first time you clean the finished bag, the exterior will shrink around the non-shrinking interfacing and lining, creating permanent wrinkles. Press everything flat. Then, cut your panels.
– Two 20″ x 12″ rectangles for the main exterior and lining.
– Two 4″ x 12″ rectangles for the end panels (exterior and lining).
– One 4″ x 40″ strip for the center gusset (exterior and lining).
Cut two of every piece from your lining fabric as well.
Step 2: Apply Interfacing to Every Exterior Piece
Following the manufacturer’s directions, fuse your fleece or stabilizer to the wrong side of every exterior fabric piece. This includes the two main panels, the two end panels, and the long gusset strip. Use a press cloth and plenty of steam. If the adhesive doesn’t melt fully, it will peel later.
Step 3: Construct the Zipper Panel
This is the trickiest part. Lay your exterior gusset strip right side up. Center your closed zipper face down on top of it, aligning the edges. Place your lining gusset strip right side down on top of the zipper, sandwiching it. Pin or clip. Using your zipper foot, sew a 1/2 inch seam along this long edge.
Flip the lining fabric over so the right sides are now facing out, with the zipper teeth at the seam. Press the seam allowance toward the lining. Topstitch 1/8 inch from the fold through all layers. This secures the lining and gives a clean finish. Repeat the exact process to attach the other side of the zipper to the other long edge of the gusset strip. You now have a long strip with a zipper running down its center.
Step 4: Assemble the Main Body
Pin one of the large exterior panels to one long side of the gusset strip, right sides together. The zipper will be in the middle. Sew with a 1/2 inch seam allowance. Repeat to attach the other large exterior panel to the other side of the gusset. Do the same with the two lining panels. You now have two tubes: one exterior, one lining.
Step 5: Attach the End Panels
Pin an exterior end panel to one short end of the exterior tube, right sides together. This is a curved seam. Go slowly, clipping the curve every inch so the fabric lays flat. Sew with a 1/2 inch allowance. Repeat for the other end with the second exterior end panel. Your bag exterior is now a three-dimensional shape, but inside out. Repeat the entire process with the lining tube and lining end panels, but leave a 6-inch gap unsewn in the middle of one lining side seam. This is your turning hole.
Step 6: Box the Corners for a Flat Bottom
This step creates the bag’s volume. Reach inside the exterior bag and pinch one bottom corner flat, matching the side seam to the bottom seam. You’ll form a triangle. Measure 2 inches from the point (this determines the base depth) and draw a line perpendicular to the seams. Sew across this line. Trim the excess fabric to a 1/2 inch seam allowance and finish the edge with a serger or a wide zigzag stitch. Repeat for the other bottom corner. Do the same for both corners on the lining.
Step 7: Turn, Press, and Topstitch
Reach through the hole in the lining and pull the entire exterior bag through it, turning it right side out. Push the lining down inside the exterior. Hand-stitch the lining hole closed with a slip stitch. Press the entire bag, paying special attention to the top opening where the exterior and lining meet. Edge-stitch or topstitch 1/8 inch from the top edge all the way around to keep the lining neatly tucked inside.
The step everyone skips? Topstitching. After each major seam is pressed, run a line of stitching 1/8 inch away on the right side. It flattens the seam, adds tremendous strength, and makes your work look store-bought. Do it around the zipper, the end panels, and the top edge.
TL;DR: Sew the zipper to the gusset first, then build the body as two separate tubes (exterior and lining), box the corners for depth, and turn it all right-side-out through a hole in the lining. Topstitch every visible seam.
How to Add Pockets and Straps That Don’t Rip Off
Pockets and straps are functional add-ons. Doing them wrong makes the bag useless.
For an external zippered pocket, cut a rectangle of exterior fabric and lining. Interface both. Install the pocket zipper using the same sandwich method as the main zipper. Before you sew the main exterior panels to the gusset, position and pin the finished pocket piece to the right side of one exterior panel. Stitch around three sides, leaving the top open. Then proceed with the main assembly. The pocket gets caught in the side seams, locking it in place.
Internal slip pockets are simpler. Cut a rectangle of lining fabric, fold and press the top edge under twice, and stitch it down. Position it on the right side of a lining panel before assembly, and stitch around the sides and bottom.
I once used a single line of stitching to attach webbing handles to a canvas tool bag. It held for a month of light use. Then I overloaded it with wrenches. The stitching was fine, but the fabric around the stitches tore like perforated paper. The webbing peeled right off.
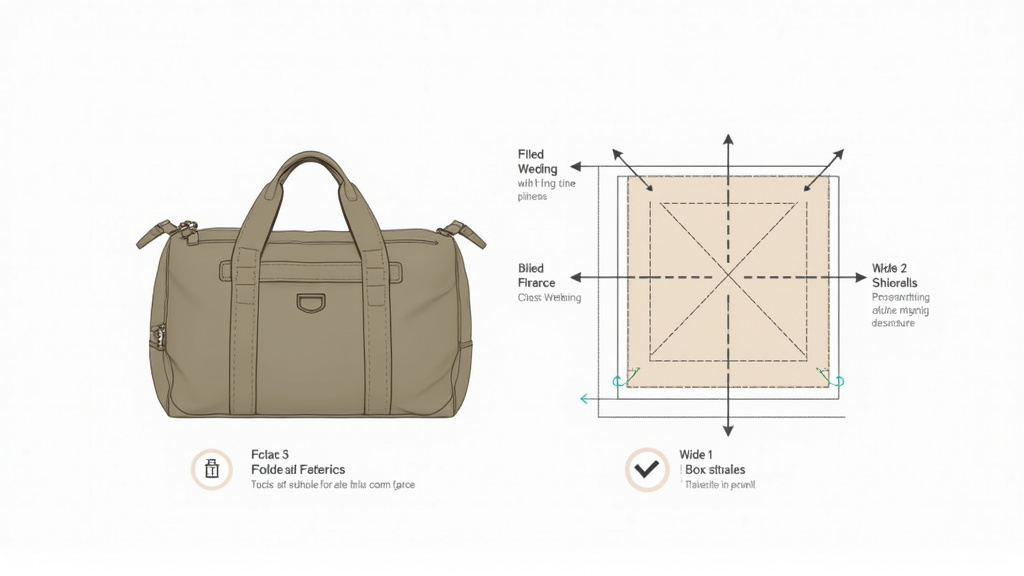
Straps need physics, not just thread. For handles, cut an 8-inch piece of 1-inch webbing. Fold it in half and slide a D-ring onto the fold. Position this assembly 2 inches down from the top edge of the bag, centered on a side panel. The folded end points toward the bag’s bottom. Sew a rectangle, then an X inside the rectangle, through the webbing, D-ring, and all layers of the bag wall. This spreads the pulling force over a square inch of fabric instead of a single line.
For the adjustable shoulder strap, attach a swivel hook to one D-ring. Feed the long strap through the other D-ring, then through the slider buckle, and back on itself. Secure with a box-and-X stitch where the strap meets the slider. The adjustability lets you switch between shoulder carry and hand carry.
| Feature | Strong Method | Weak Method | Failure Timeline |
|---|---|---|---|
| Handle Attachment | Box stitch with an X inside, through webbing, D-ring, and bag layers. | Single or double row of straight stitching. | Fabric tears at stitch holes after 20-30 heavy lifts (2-3 months of gym use). |
| Zipper Installation | Zipper sandwiched between exterior and lining gusset, then topstitched. | Zipper sewn onto a single layer of exterior fabric. | Zipper tape separates from fabric under tension; seam rips open within a year. |
| Internal Pocket | Lining fabric pocket sewn into side seams during main assembly. | Pocket glued or lightly stitched onto lining after bag is finished. | Glue fails with heat/moisture; stitching pulls through lining when pocket is full. |
Canvas vs. Nylon vs. Leather: Which Fabric Should You Use?
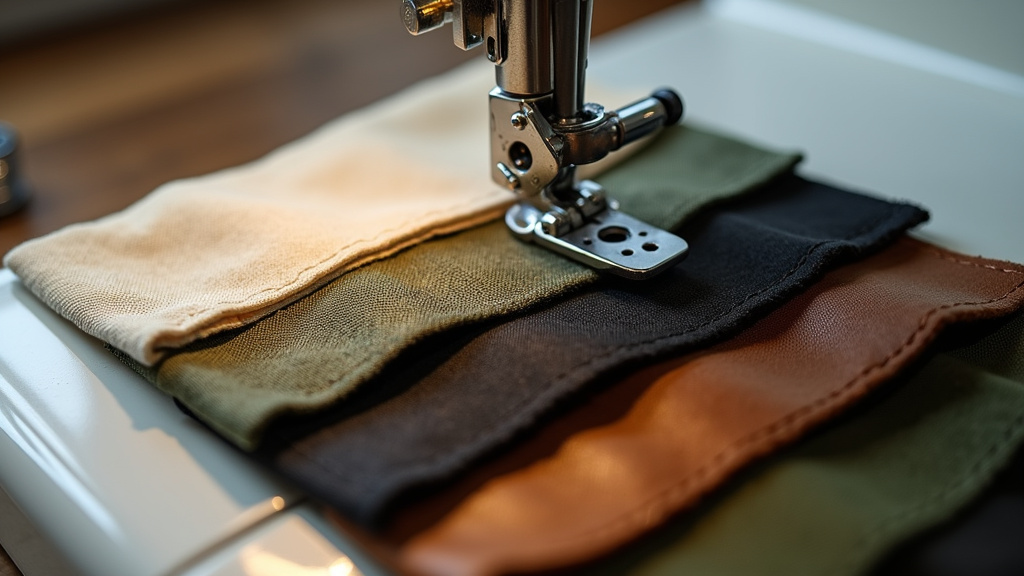
Your fabric choice changes the tools, technique, and final use case. There is no universal best.
Canvas is the default for a reason. It’s cheap, easy to sew, and takes interfacing perfectly. A 10-15 oz cotton canvas bag with fusible fleece will last for years of rough use. It molds to your gear but holds its shape. The downside is weight. A fully lined and interfaced canvas duffle is heavy even empty. It also absorbs water and takes forever to dry.
Cordura nylon is a technical fabric. It’s lighter, more water-resistant, and has a higher abrasion rating than canvas. You need a Teflon or roller foot to sew it because the coated surface creates drag. It also doesn’t fuse well with standard interfacing. Use a sew-in stabilizer instead. Cordura is the pick for a travel bag that gets thrown in the rain or a gear bag for hiking.
Leather is a statement, not a practical first project. You need a leather needle, heavy-duty thread (like #69 nylon), and a machine that can punch through it. Skip interfacing. The leather provides its own structure. Pre-punch stitching holes with an awl for precision. The result is beautiful and develops a patina, but the bag will be extremely heavy and the material cost is high.
Waxed canvas sits in the middle. It has the look of leather with the sew-ability of canvas, mostly. The wax gums up your needle, so keep a bottle of rubbing alcohol and a rag nearby to clean the needle every few minutes. Use a leather needle. Don’t iron it directly—the wax will melt onto your iron. Use a press cloth.
TL;DR: Use canvas for your first bag. It’s forgiving and requires no special tools beyond a heavy-duty needle. Move to Cordura for a lighter, weather-resistant bag once you’re confident with the construction steps.
Troubleshooting the 3 Most Common Duffle Bag Failures

You’ll know something’s wrong before you finish. Here’s how to fix it without starting over.
The zipper puckers or waves. This happens when the zipper tape is stretched or compressed as you sew. The fabric and zipper must be perfectly aligned and flat under the foot. Use more clips than you think you need. If it’s already sewn and puckered, your only fix is to remove the stitches, press the zipper tape flat with steam, and try again. Going slower with the walking foot usually solves it.
The corners are rounded, not sharp. You didn’t clip the curves enough. When sewing the circular end panels to the tube, you must make small snips into the seam allowance of the tube fabric every inch around the curve. This allows the fabric to spread and lie flat when turned right side out. If it’s already sewn, you can sometimes salvage it by turning the bag right side out, pressing the seam aggressively with a tailors clapper, and then topstitching very close to the seam to hold the crisp edge.
The bag is inside out and you can’t turn it. You forgot to leave the zipper open or you sewed the lining shut. The zipper must be at least one-third open when you sew the final end seam on the lining. That opening is your escape route for turning the bag. If it’s completely sealed, you have to carefully rip open a few inches of the lining seam, turn the bag, and then hand-stitch the lining closed.
Common mistake: Skipping the topstitching around the zipper — the seam allowances roll and create a bulky, uneven lip that catches every time you open and close the bag. The zipper slider will jam within a week.
The bulky seams at the strap attachments can jam a home machine. Go slow. Hand-crank the machine through the thickest parts—the intersection of the webbing, D-ring, and four layers of canvas and interfacing. If the needle deflects and skips stitches, stop. You likely need a larger needle (try a 110/18) or to reduce the presser foot pressure.
Frequently Asked Questions
What is the best thread for sewing a duffle bag?
Use an all-purpose polyester thread for construction and a heavier topstitching thread (like Gutermann Mara 100) for visible seams. The polyester has more strength and stretch than cotton thread. For heavy-duty bags with webbing, a #69 bonded nylon thread is overkill but won’t break.
Can I make a duffle bag without a sewing machine?
Technically yes, but it’s a multi-day hand-sewing project and the seams won’t be as strong. The critical strap attachments and topstitching require consistent, high-tension locks that are difficult to achieve by hand. For a durable bag that carries weight, a machine is essential.
How much does it cost to make a duffle bag versus buying one?
homemade canvas duffle with quality materials (YKK zipper, polypropylene webbing, D-rings) costs between $40 and $60 in materials. A comparable pre-made bag from a brand like Duluth Pack or Filson costs $150 to $300. You save money, but you invest 4 to 6 hours of labor.
How do you clean a homemade canvas duffle bag?
Spot clean with a damp cloth and mild soap. For a full clean, use a soft brush, cold water, and a technical fabric cleaner like Nikwax Tech Wash. Air dry completely away from direct heat. Do not put it in a dryer—the heat can weaken the adhesive on the fusible interfacing and cause it to separate. For long-term storage, a proper cleaning your duffel bag routine prevents mold and fabric degradation.
What size zipper do I need for a 20-inch bag?
The zipper should be 2 to 4 inches longer than the bag’s width to account for the ends and provide tabs for pulling. For a 20-inch wide bag, a 22-inch or 24-inch #10 coil zipper is ideal. The extra length gets trimmed after installation. This is a key detail in any thorough duffel bag sewing guide.
Before You Go
Making a duffle bag is about managing thickness. The sequence—interface, attach zipper, build tubes, box corners, attach straps—is designed to keep the layers you’re sewing at any given time to a minimum. The moment you try to sew through eight layers of canvas, fleece, and webbing all at once is the moment your machine jams or your needle snaps.
Pick a robust fabric like 10-oz canvas for your first attempt. Its stiffness hides minor sewing imperfections. Follow the strap reinforcement method with the box-and-X stitch religiously. That single detail is what separates a homemade bag from a professional one. Finally, press every seam before you topstitch. The iron is as important as the sewing machine.
The bag you make will fit your gear perfectly because you built it. Understanding the duffel bag’s military origin explains the simple, rugged panel design. And knowing the standard duffel bag sizes helps you scale the pattern up for a week-long trip or down for a gym bag. The skills from this duffle bag sewing pattern transfer to other gear, like backpacks and tool rolls. Once you get the feel for webbing and heavy zippers, a whole category of DIY gear opens up.